Jack Graham Photography
Learn to See Learn to think Learn to create
2012 Workshop Schedule https://www.jackgrahamphoto.com/2012-workshop-schedule
2013 Workshop Schedule : https://www.jackgrahamphoto.com/2013-photography-workshop-schedule
2012 Registration Form REGISTRATION FORM 2012v9
2013 Registration Form REGISTRATION FORM 2013v2
Workshop Referrals: https://www.jackgrahamphoto.com/referrals
One on One, Individual Workshop information https://www.jackgrahamphoto.com/one-one-field-studio-photography-workshops
Workshop FAQ’s GENERAL WORKSHOP QUESTIONS_FAQ’S INFORMATION_v2013a
______________________________________________________________________________
 Jack Graham E-Book Series 1 & 2 now available for purchase and instant download:
https://www.jackgrahamphoto.com/shop/e-books
Noteworthy There is still space on me upcoming workshop in Northern California which I am conducting for the Pacific Northwest Art School on Whidbey Island in September. Act fast—!

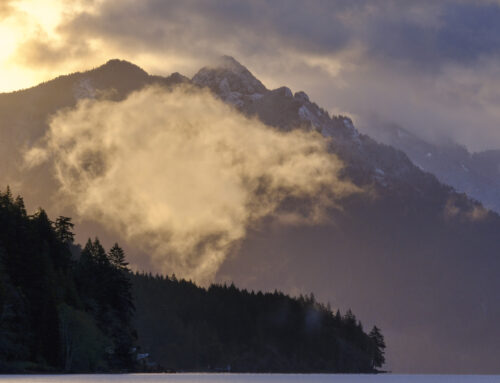
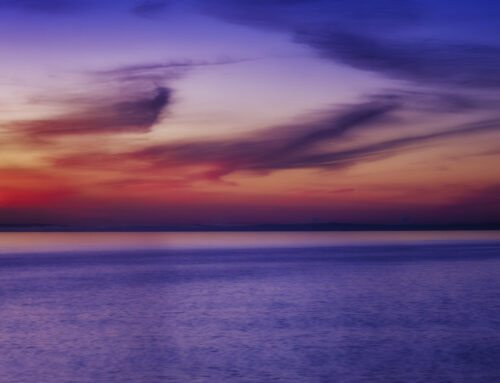
Glacial Lagoon, Iceland © Jack Graham
ICELAND 2013 and GREENLAND–JULY2013 are filling as well!!!!
https://www.jackgrahamphoto.com/ultimate-iceland-2013-limit-10-attendees
https://www.jackgrahamphoto.com/ultimate-greenland-new-2013
____________________________________________________________________________
_________________________________________________________________________
FEATURED ARTICLE:
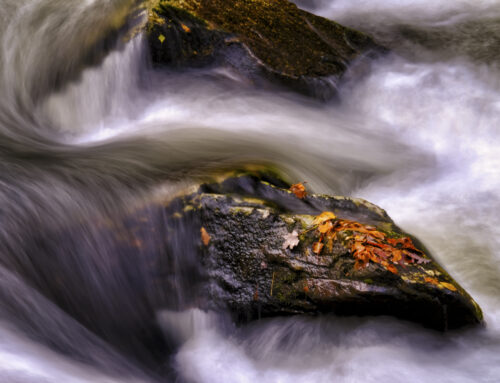
WHICH ONE WORKS # 9…………..COLUMBIA RIVER GORGE STREAM
This is a new feature I am going to publish here on my blog every week or two. I’ll discuss and compare images and talk about why I like one over the others.
This process is a common one that we all deal with in our digital darkroom. The final image is important for whatever project it’s being used for, and spending time determining which image works vs. another is well worth it. In many case the slightest difference in composition, light etc makes all the difference,
Often we may take many frames of a subject in different light and different angles. Each frame can evoke a different feeling to the subject.
Always remember that you need a good subject and acceptable light, or your final image will probably be less than desirable.
You comments, as always are more than welcome.–JG
______________________________________________________________________
LOCATION: Columbia River Gorge, Oregon.
THE STORY: The Columbia River Gorge in Oregon is known around the world for its magnificent waterfalls, steep cliffs, thick forests and more. It is all of that and more. Some days are more conducive to photography in the gorge than others. I spent this morning with a photography student looking for some photographic opportunities. After a decent sunrise, we ventured deeper into the gorge. It was extremely dry. The forests were dry, with very contrast light. The rocks in the streams and waterfall areas were dry so we had to work somewhat different than we would, say, in the wet spring, which is so beautiful here I the Columbia River Gorge. Here in Oregon, we are in our summer weather pattern which is little or no rain and warm conditions. Today is not too bad, but we are expecting 100 degrees or more on Thursday and Friday. We were somewhat challenged, so I decided to visit one of my “not on the tourist map” spots.
TIP—Check out my workshop in the Columbia River Gorge in October as well as 2013 here:
I’ve photographed this area many times in many different seasons. Today we had some challenging light as we were right on the cusp of being too harsh to photograph this location. However we made the best of it. The following images were the result. Which one works for you?
TECH DATA: All Images were taken on a Nikon D700, using an 80-200 2.8 ED IF / Nikon Polarizer. Gitzo 3541 Tripod, Really Right Stuff Ball Head/.
Images processed in Adobe Lightroom, the comparable processing in NIK SOFTWARE, Define, Vivexa2, Color Efex Pro4. Curves and Levels and some fine-tuning applied in Adobe Photoshop.

Image #1
IMAGE 1) 07:31:19 AM
ISO: 200 Focal Length Used 112mm
1.5 sec, f/16 Exp comp: -1/3
Mode: Av Metering: Multi-segment
_____________________________

Image # 2
IMAGE 2) 07:31:40 AM
ISO 200 Focal Length used= 100mm
1/3 sec, f/16 Exp comp: -1/3
Mode: Av Metering: Multi-segment
__________________________________

Image #3
IMAGE 3) 07:32:11 AM
ISO 200 Focal Length Used = 100mm
1/4 sec, f/16 Exp comp: -1/3
Mode: Av Metering: Multi-segment
__________________________________
THE EDIT:
What I like about all 3 images:
As I always stress in my workshops, before clicking the shutter, ask yourself: Is there a good subject and is the light good. We have a good subject here to work with. However the lights just OK… not the greatest, not the worst. These images were taken about an hour and 10 minutes after sunrise.
The S-Curve of the stream leads the viewer’s eye to the back of this image. This creates some drama and curiosity. What is back in those trees? I think this keeps the viewer is attention for a few minutes longer than an image not containing this kind of curiosity.
I like the many shades of green seen here. The trees and reflections are above average since we had no wind. The compositional aspects of these images are strong.

Image #1
IMAGE 1
What I like: —- I love the compositional aspects of this image. The background of the forested mountainside offers an interesting diversion from the water and trees in the image. There is good space between the trees, in other words, no merges of tree trunks
What I don’t like….There are few minor things wrong with this image. Yes I could easily “fix” them, but I left them in to show how little things can improve an image. First, look for the dead tree branch, very, yet small on the left side just below center. This should be removed or better yet, I should have eliminated this in camera.
TIP: Most of us do NOT have 100% viewfinders. I did not see this in my viewfinder. Remember this when you are in the field.’ Get it right in the camera. Don’t count on fixing it in post processing, sometimes you forget!
I also don’t like that there is little or no space between the trees and the top of the image. Especially to the right of center.
I am not happy with the light, but I processed this as best as possible. Is this worth keeping? Probably not.

IMAGE # 2
IMAGE 2
What I like: —- I like the same basic things as image #1. However here I like the patterns of the “S” curve better. The reflections are stronger. The tree on the left serves as more of an anchor for the images than it does in Image 1 & 3
What I don’t – The shadows on the right were harder to control. I used Nik Viveza to pull out some of the shadows, but there were tough to bring out. I could not bring any more out than I did. I think the shadow where the water disappears is to dark in this image. As well the light here is borderline light.

IMAGE #3
IMAGE 3
What I like: —- Other than the compositional aspects, not as much as image #2. I do like the two trees on the right side a lot.
What I don’t – I think the sky takes away a lot from this image. Perhaps if there were clouds or some drama the sky might work. Even if the sky was a real nice blue it would by possible to leave in, but this hazy, milky blue just doesn’t work at all.
The patterns in the “S” curve are not as strong as image #2. Of the three images this is more of a “Postcard” image rather than an interesting photograph.
What I don’t like about all three images ………………As discussed, the biggest drawback for me is the light. This light is borderline…”Let’s go have breakfast light”, however typical of summer in many locations. This is why we get up in the dark to capture images in the sweet light on pre sunrise and stay out until dark to accomplish the opposite.
 I cropped out the sky and then converted Image # 3 into Black and White using NIK Software’s Silver Efex Pro2 . Why number three if it was my least favorite of the 3 images?
1) I really like the two trees on the right.
2) As a Black and White I like the composition without the sky better.
Often, when the light is “borderline” or even harsh you might be able to come away with some decent black and whites if you work hard enough.
TIP: when making your images, if you know you will be converting them to Black and white in post procession, keep that in mind when taking the shot. You may need to over expose or underexpose depending on the scene, even though for a color rendition you may not
FINAL DECISION:
I can live with number 2, however you can bet I am going back here on an overcast day and capture the deep greens, great water and tree trunks when not showing this much contrast. For now, I’ll live with the black and white image.
I bet some of you are wondering …”why didn’t he shoot this using HDR. Maybe HDR would have made this image more flat and make it easier to see what’s in the shadows, however to do that it would mean eliminating almost all of the other shadows , which are quite nice ( especially in image #2). I will only use HDR when I think (or know) that I can process the image and not have it look like a HDR image. That’s just my taste and doesn’t make HDR right or wrong.
What do you think?
JG