 JACK GRAHAM PHOTOGRAPHY www.jackgrahamphoto.com
LEARN to SEE LEARN to THINK LEARN to CREATE
______________________________________________________________________
2013 Workshop schedule Workshop Registration Form Workshop Overview
Workshop FAQ’S Workshop Referrals One on One Individual Workshops
JACK GRAHAM PHOTOGRAPHY e books –available for purchase and immediate download
NEWS and NOTEWORTHY
I’ll be in Jacksonville Florida for the North American Nature Photography ( NANPA) Summit Feb 28-Mar 3rd. This should be a great event with some great speakers (come here my friend Guy Tal!), breakout sessions and lots of learning and networking. Details can be found HERE.
I am proud to also announce that I’ve been asked so serve on NANPA’s Board of Directors.
In addition to our (almost full) July 4-14, 2013 Ultimate Iceland Workshop, we have added a second workshop in July with a completely different itinerary. You can access this information here. Again, seats on this workshop are limited.
ULTIMATE ICELAND “1” July 2013
ULTIMATE ICELAND “2” July 2013
You can see some images made my last year’s attendees here http://jackgraham.photoshelter.com/gallery/2012-ICELAND-WORKSHOP-ATTENDEE-IMAGES/G0000dpVO0jXHKCI/
 This October, will be my 19th year conducting a workshop in the Eastern Sierra. Again, I’ll be joining forces with my good friend, an amazing photographer and thinker, and co-leader Guy Tal. Please consider joining us. This is a highlight of the year!. Details found HERE.
Also in October, I’ll be back in NE Ohio for our bi-annual FALL COLOR & A DAY with the AMISH PHOTOGRAPHY WORKSHOP. (including a private Amish dinner) with my Amish friends on their farm in Sugarcreek Ohio. I’ll be teaming up with my good friend, world class photographer and teacher Bill Fortney(www.billfortney.com) for a workshop you will not want to miss! I’ll be in Utah October 2013 for a late October workshop in the red rock country in and around Zion NP
I receive many requests for the link the webinar I conducted for NIK SOFTWARE entitled, “Keeping it Simple .You can view it here: ( if you purchase any or all of the NIK Software package… enter code JGRAHAM and receive a 15% discount!!! HERE is the link to the webinar
________________________________________________________________
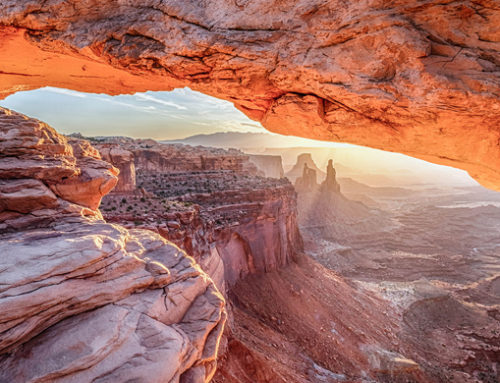
Everything You Need to Know about
Photographing Upper and Lower Antelope Canyons
©Jack Graham and Jack Graham Photography
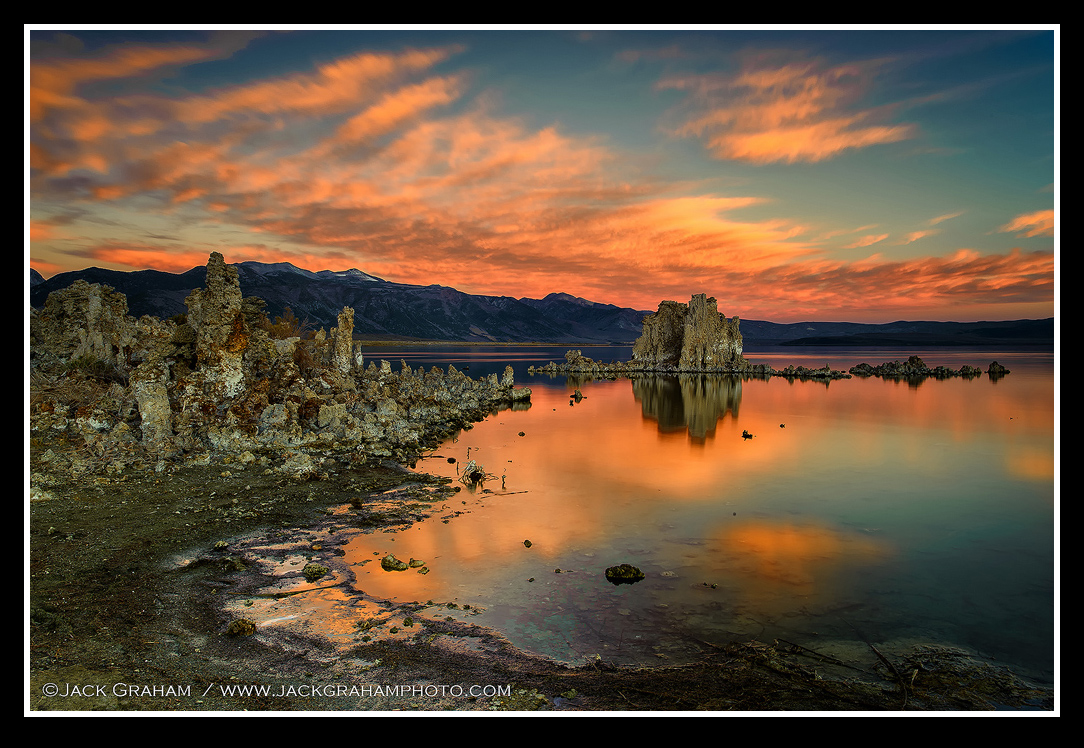
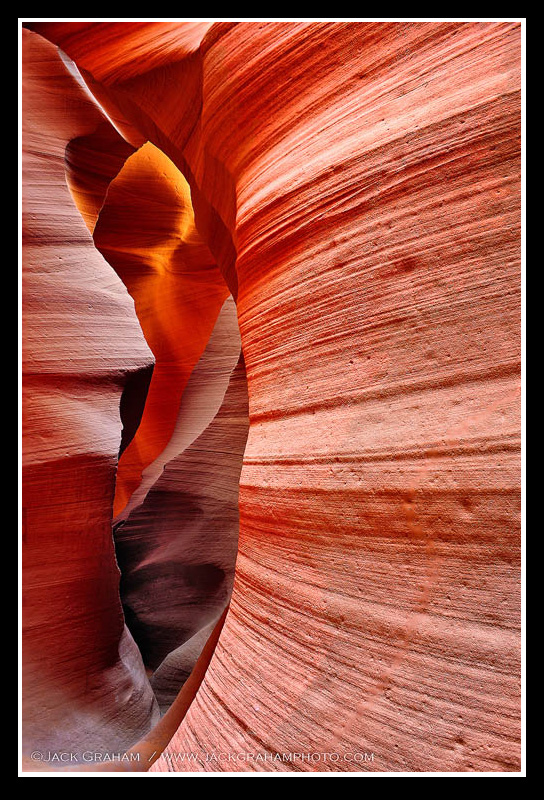
 Upper and Lower Antelope Canyons located in Page Arizona, are one of the many wonders of the world, as far as I am concerned. The Colorado Plateau Located here in the southwestern United States contains many deep, narrow canyons that were carved out by water over millions of years. Under proper conditions, reflected sunlight makes the canyon walls glow with amazing shades of pink, brown, orange and yellow. These canyons attract photographers from around the world. Upper and Lower Antelope Canyons are also referred to as Corkscrew Canyon.
Dealing with photographing the canyons can be challenging if you don’t know what you are doing, however learning and preparing before you go is quite easy. The canyons are both located close to one another and are on Navajo land. Proper permits and admission fees are required.
It seems that we all, myself included who visit the over photographed Slot Canyons (Lower & Upper Antelope Canyon in Page AZ) look for that quintessential image that will forever be indelibly etched in our brains. I always make attempts to get some images that are unique, and ones I have not seen in publications before.
Both Antelope canyons are uniquely different, but beautiful in their own way. Both offer some very different experiences. Being prepared for these experiences is essential for successful imagery in the canons.
What both canyons have in common
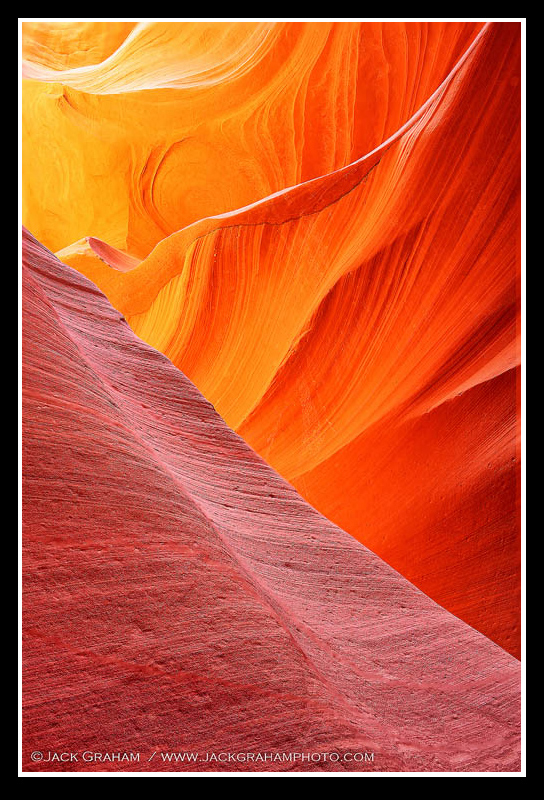
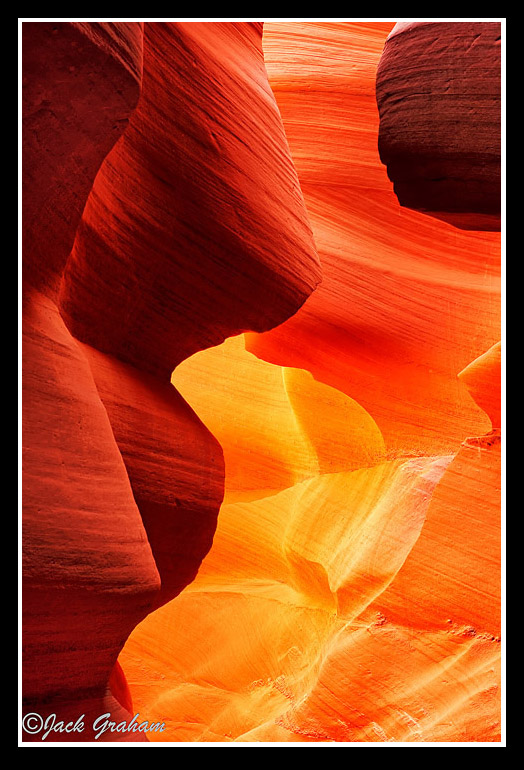
To attain interesting images in all of the many slot canyons in the American Southwest, you need to look for light reflecting off the multi-colored canyon walls. Often the sunlight is shining down directly on a wall. Look towards the opposite side of the canyon and you will usually see glowing oranges and reds. The parts of the canyon that is illuminated by reflected light will be the most dynamic. You will often find that adding saturation in post processing is not needed.
As your time in the canyon moves on, the light will constantly change and transform before your eyes. In the spring and fall, my favorite times to visit the peak times for both canyons are between 11am and 2 pm. I have photographed these canyons in every season with success.
Safety first! All slot canyons are prone to flash floods. If you are caught in a canyon during a flash flood you will most likely be unable to exit the canyon before it is too late. Floods can happen all year long but July through August, when the summer monsoons occur, is when the heaviest rainfall and thunderstorms occur. Though they weather may be clear you must be aware that rain falling miles away can drain into the canyons. Lower Antelope Canyon had a bad a flash flood that killed 11 tourists in 1997. There was little or no rain in Page, but miles away there was a deluge. These tourists ignored warnings and paid with their lives.
Upper Antelope Canyon:
 Upper Antelope Canyon is shorter in length and easier to navigate. You literally walk through the canyon rather than descending down into the canyon. Because of the ease of accessibility, the Upper Antelope Canyon can be much more crowded than the Lower Antelope Canyon. You’ll notice many non-photographers walk through this canyon and depart.
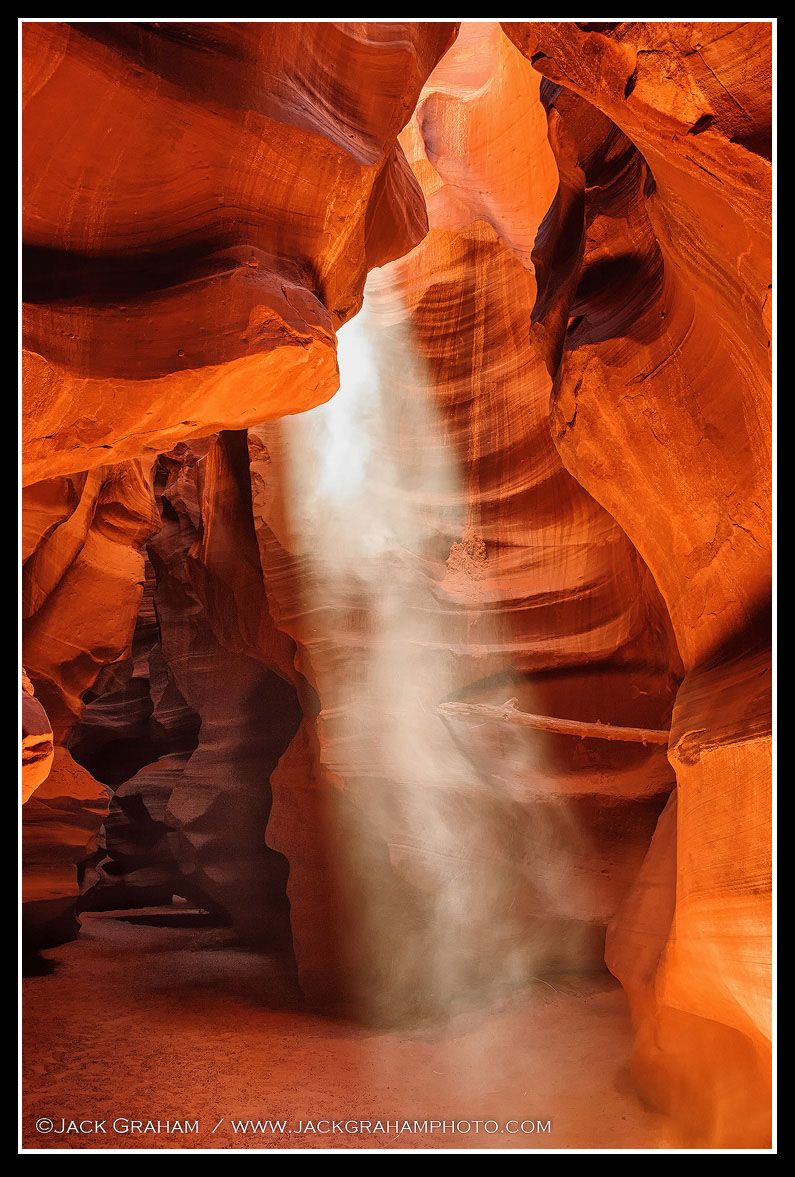
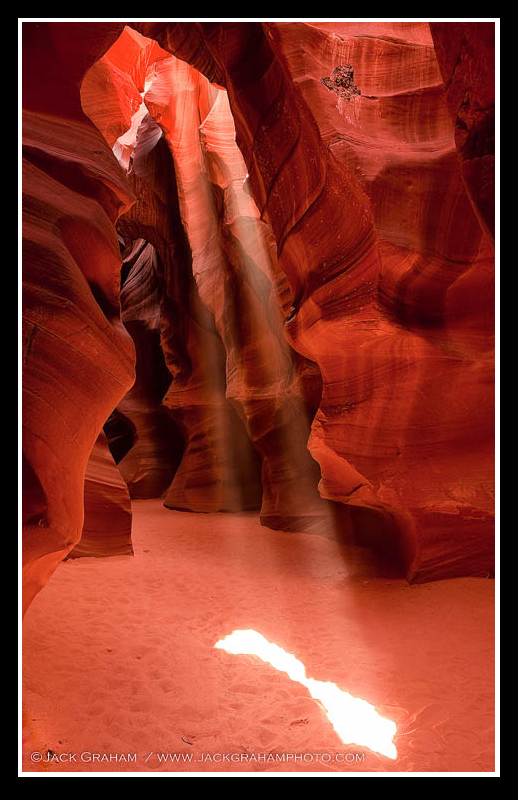
The biggest difference between the two canyons is the availability of light as well as many more and large light beams or shafts of light shining down between the cracks in the sandstone walls. These beams are available from March through about mid-October.
The best time to photograph Upper Antelope Canyon is from around 11 am to 2 pm. Though the light beams last a bit longer during the summer months, I prefer the spring and fall. During the summer, this canyon is even more crowded than it is in the spring and fall.
It is necessary to use a Navajo Guide in this canyon. There are many guides available in nearby Page Az. As a photographer, make sure you ask for the longer “Photography tour” of the canyon. This costs a bit more, but will give you about 2 hours in the canyon, rather than the regular 45-minute to 1-hour tour. Most guides that cater to photographers will know the timing of individual shafts of light and precisely when they will appear. It is uncommon to be in Upper Antelope Canyon without crowds. You’ll need to cooperate with other photographers. Again, your guide should help you maneuver and work with other groups and photographers to allow you to get your image.
Most of the light beams appear and disappear quickly and will move across the canyon floor until they disappear. Since they only appear for a few minutes, you will need to be in place with your tripod and perhaps even make some exposures to make sure your settings are accurate.
Often your guide will throw sand straight up in the air allowing the light beam to reflect off the falling sand. This creates a reflective area for the light to bounce off and create some very eerie formations.
Lower Antelope Canyon
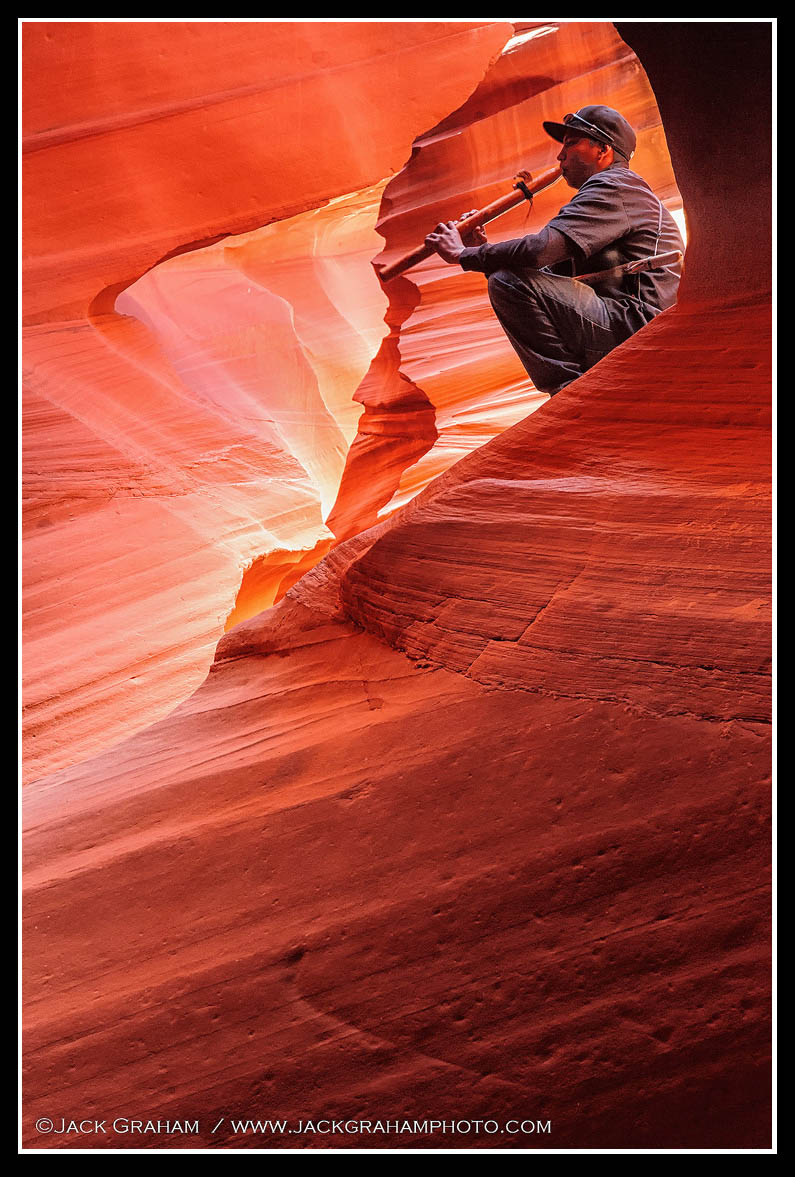 Lower Antelope Canon is located just slightly down the road and across from the Upper Antelope Canyon. The Lower Antelope Canyon is much longer and much less crowded. Though you must pay an entrance fee, there are no formal tours of this canyon. After paying the fee (ask for a photographer’s badge, you’ll get extra time in the canyon). You can explore and photograph the canyon at your own pace. There will be guides wandering around, perhaps playing a Navajo flute to answer questions and make sure that everyone is moving about in a mannerly fashion.
 The first time you approach the narrow slit which you have to climb down into to get inside the canyon you may become wary of the difficulty of getting through this narrow crack. Don’t let it worry you, it gets easier, and easier to navigate one you get lower and used to maneuvering the canyon walls. There are steel ladders attached to the sandstone walls. Years ago it was common to have to climb down wooden ladders, unattached to the walls. It is much easier now. Be prepared to not be as dust free when you exit.
Like Upper Antelope canyon I have found the best time to be there is between 10:30 and 1pm.
Many areas in this canyon are very narrow especially when carrying a backpack and tripod. Though the crowds are significantly less you may still need to move your equipment to allow other to pass through. At the very end of the canyon, there is a long spiral stairway that leads back up to the surface. You can easily walk back to the parking lot from there. I usually like to walk back through the canyon, tracing my route back to the entrance.. The light will be very different when you are exiting. You can buy water at the pay station after your trek.
Must Have Equipment
A tripod and cable release is mandatory. You’ll be making some long exposures. It is impossible to make quality photographs in these canyons while hand holding your camera. Exposures of thirty seconds or longer are common due to the limited amount of light, as well as the need to use small apertures ( for depth of field) along with the need to use low ISO settings for the best image quality. If you choose to use a polarizing filter, this will increase your exposure time even further. (Using of a polarizer will diminish undesired reflections and allow the amazing colors of the canyons to come through magnificently.
Lenses
I use wide-angle lens (16-35mm range on a full frame sensor) most of the time in the canyons, I also enjoy using a medium telephoto (50-80mm range) lens to bring out details on the rock walls. You will quickly figure out that there are images all everywhere you look..
Exposing in the canyons
 Exposures can be a little tricky your first time in the canyons. As always, use your histogram and LCD to evaluate your results. Today’s digital cameras are much more forgiving than those from back in the film days. There were only five stops between total overexposure and total underexposure using Fuji Velvia. We have many more tools now to tell us if we have the right exposure or not.
1) Avoid using flash. It will not only ruin other photographer’s images but create unnatural images.
2) First you need to set your ISO. By using lower ISO’s ( 100 -200) you to be able to make higher quality, large prints With today’s modern cameras, ISO’s of 400-800, or even higher are quite acceptable and allow you to attain more depth of field. Since you are using a tripod, shutter speeds are not that concerning. However different shutter speeds create different effects when photographing the sand falling through the light shafts in Upper Antelope Canyon, I always try to keep my exposure times to 30 seconds or less since longer exposures increase the digital noise
3) I like to use apertures of F11-F16 when using my wide-angle lenses. You will need to adjust your ISO, aperture and shutter speed depending on the conditions (especially the light beams as stated previously). The reality is that other than these beams and sand, there is nothing moving in the canyons, so shutter speeds of 2-10 seconds are acceptable.
4) Different exposures will render different results. I recommend that you bracket your exposures and decide which you like when you get back to your studio.
5) Avoid areas of rock that are directly lit by the sun. These areas will be a blown out. For very difficult exposures the proper use of HDR can be helpful.
Making Quality Images in the Canyons.
This subject is as important as any. We have talked about the canyons, and technique. Let’s talk about the experience and how you will come away with quality photographs.
The first time you visit these canyons, it can be overwhelming. You have seen thousands of images over the years and now you are finally there, at one of the must photograph locations on any photographers to do list, worldwide. Now, how do you make it so you come away with creative images? There is one easy way. Slow Down! I always see photographers clicking away with no real purpose. Some figure that the more images they make the better chance of getting a great one is. This is false.
You have to be careful, from a physical aspect in these canyons. You also need to be sensitive to other visitors and photographers as you are attempting to capture images for yourself. By slowing down and studying the light, foregrounds, patterns and textures you will get those images that others won’t.
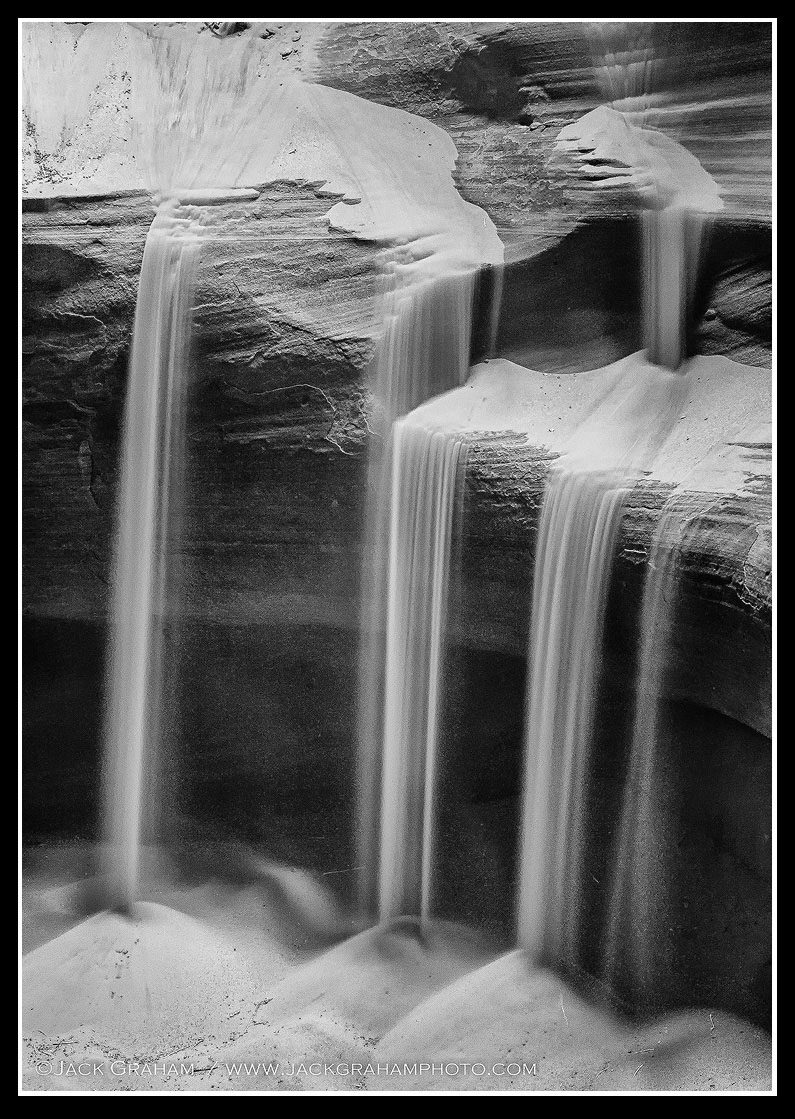 Perhaps think outside the box. Though the color can be quite amazing, sometimes a black and white or monochrome image might make for a even more powerful image. We all see images from these canyons in color, few in monochrome. Why not try it
Relax, enjoy the experience and work as a photographer, not the impatient tourist.
What to Avoid and Look Out For
1) With very few exceptions do not include sky in your image. Again, avoid extreme highlights. Look for reflected light.
2) Be careful of you and your equipment. Maneuvering in these canyons can be challenging to say the least.
3) Avoid being hasty. Relax and enjoy the experience.
4) Some are also extremely narrow passages, especially in Lower Antelope Canyon. A large camera bag may, make our movement through these, in spots, narrow canyon walls difficult. Carry as little as you need.
5) Be careful to not knock your camera against the canyon walls when you are maneuvering through narrow passages. I’ve seen top of the line cameras come out of the canyons broken. That goes for lenses too!
6) If there was recent rain, some of the canyon floors can be muddy. Be prepared for that and be careful as this mud can be very slippery
7) It is important to consider dust when in the canyons. There is always lots of dust in the canyon, especially when your guide is throwing sand into the light shafts. On windy days sand can literally blow into the canyon from the surface. I suggest using some kind of wrap or even a shower cap to cover your camera when not in use. Believe me this dust can get into cameras and keeping out is sometimes tough. If at all possible never change in the canyon. There is dust in the air even if you can’t see it. You’ll start seeing dust spots on your images if you are not careful. I carry cans of compressed air to blow on my camera body when I finish my sessions in the canyons (never use this air on glass of LCD Screens!)
8) Remember, this land belongs to the Navajo. This is sacred land. Please respect the canyons in all ways.
 What Else to Bring With You and Think About
1) You may also want to bring a small flashlight and a bottle of water during the summer.
2) I would bring a dust blower. Be careful removing dust off your lenses. This sand can scratch you lens easily. DO not use compressed air on your glass. Remember again to think about protecting your lenses and cameras from dust.
3) The temperature in the canyons is pretty constant in the spring, and fall. Temperatures are usually in the 60-70 degree range. Winters are colder, summers obviously hotter, but still cool compared to the heat of the summer in Page Az. Though it may be hotter on the surface, it can be a bit cool in the canyons so dress accordingly. Heavy coats are unnecessary.
4) Good hiking boots are essential.
5) You’ll be making some long exposures. That means batteries may run out. Bring extras, and make sure your batteries are fully charges before you venture into the canyon.
6) Don’t forget enough memory as well.
Enjoy your experience. You’ll never forget your time here.
The right to download, store or output any content on these websites www.jackgrahamphoto.com and www.jackgrahamsblog is granted for preview purposes only and may not be reproduced in any form .All Photographs appearing on these sites are the property of Jack Graham unless otherwise noted.
These photos are protected by U.S.Copyright laws and are not to be downloaded or reproduced in any way without the written permission of Jack Graham
By entering these sites you accept these terms. If you need permission to use a photo on these sites please call
503-625-1430 or email Jack @ Jack@jackgrahamphoto.com

These photos are simply breathtaking. I’d love to participate in one of your photo workshops, Jack.
Sterling,
Thanks for your kind words…. if you get to America, it would be my pleasure to have you join us!. Thanks again—Jack
I’m really enjoying the design and layout of your website.
It’s a very easy on the eyes which makes it much more pleasant for me to come here
and visit more often. Did you hire out a developer to
create your theme? Fantastic work!
My website has been up for almost 14 years or so . I designed it and it is maintained by an outside person. I can handle about 25% of hat needs to be done. My marketing assistant does the other 75% and my web “guy handles the rest….. My blog design was dome my marketing assistant 100%. I add content sometimes, but she is my right hand person and does a great job!
Hello Jack. Thank you so much for giving these useful details. Awesome photos from you!! I plan to go Antelope Canyons this December but have not decided yet. For taking photos, is it a good time to visit there during December?
Considering a winter visit would it still be worthwhile as far as photography is concerned?
Thank you… very comprehensive explanation with very useful details. One of the best articles about how to photograph the canyons.