WORKSHOPS 2011 https://www.jackgrahamphoto.com/2011-workshop-schedule REGISTRATION FORM 2011v8
Eastern Sierra, October 2011 —SOLD OUT ( email me for waiting list)/ few spots available for others…2012 workshop 1/4 filled
Very limited opening for October in NE Ohio/ including a very special day with the Amish https://www.jackgrahamphoto.com/fall-color-ne-ohio-well-very-special-day-amish-oct-2011
WORKSHOPS 2012 –(Including China & Iceland!!) https://www.jackgrahamphoto.com/2012-workshop-schedule REGISTRATION FORM 2012v4
ONE on ONE /Individual Training Workshops https://www.jackgrahamphoto.com/one-one-field-studio-photography-workshops
WORKSHOP DISCOUNTS: 2011 WORKSHOP DISCOUNTSv4
CURRENT PODCAST: Interview with Marc Adamus( www.markadamus.com) , outdoors man and one of my favorite photographers –CLICK here for PODCAST www.18percentgraymatter.com
____________________________________________________________________________________________________________________________________________
NEWS:………………… Look for my new E-Book coming in September…. Stay tuned!
NEW E-BOOK from Guy Tal —– click here for details- -THIS IS A MUST HAVE! http://guytalbooks.com/catalog_show_ebook.php?bid=5
![]() I am proud to announce that SINGH RAY filters ( www.singh-ray.com ) is now a sponsor of Jack Graham Photography Workshops. Attendees can receive a 10% discount. Contact me for details
I am proud to announce that SINGH RAY filters ( www.singh-ray.com ) is now a sponsor of Jack Graham Photography Workshops. Attendees can receive a 10% discount. Contact me for details
jack@jackgrahamphoto.ocm ….(it can add up fast!!)
________________________________________________________________________________________________________________________
MAIN ESSAY/ AUGUST 12/2011…………………………..UNDERSTANDING DEPTH OF FIELD …………………. and how to use it correctly
©Jack Graham / Jack Graham Photography All Rights Reserved
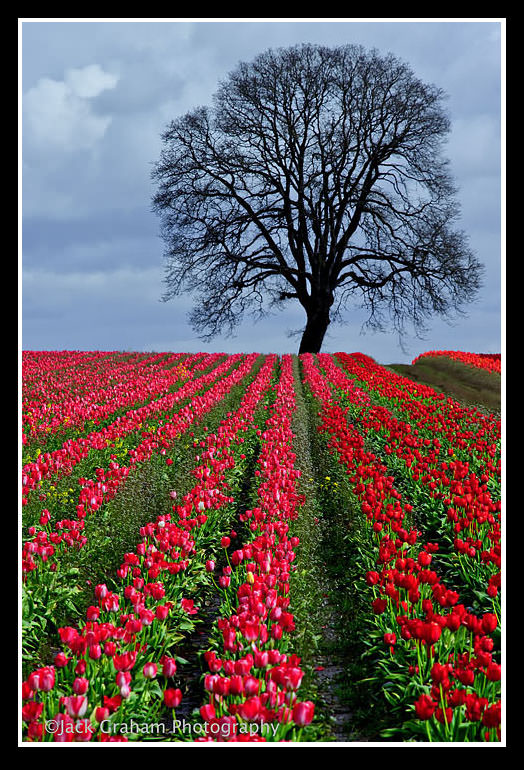 If you were to talk to many of my workshop attendees and they will tellyou there are a few things I really espouse throughout the workshop, hopefully not to the point that its information overload. One of these techniques is DEPTH of FIELD. Some of of my attendees did not know what depth of field is, let alone how to achieve it. Some didn’t understand it and others thought it too complicated and therefore have never mastered the techniques. Well, it’s not complicated at all, once you understand it, and perhaps this essay will help explain it to you in as easy terms possible. I will state that Depth of Field is essential in every form of photography and must be understood and applied.
So, what exactly is depth of field? Simply, it is the amount of detail, within the image that is in focus. You, the photographer must decide on how much depth of field (DOF) is desired. Do you want the entire image in focus? Do you want the background out of focus ( often referred to as blown out—-I don’t really like that term as “blown out” might refer to overexposed, not out of focus).
Once you make the decision on how much of the image you want in focus, you must understand the technique that must be used to achieve your goals.
Decisions on setting to attain Depth of field are
1) The F-Stop (see below) chosen to make the image
2) The focal length of the lens
3) Subject size (the depth of field decreases as you decrease the lens/subject distance
4) How far away is the subject?
LENS OPTIONS
Choosing a lens will have a dramatic effect on your depth of field. Lenses below the 60mm range are capable of attaining a large depth of field. (wide angle lenses) The DOF affect attained with lenses above 60mm will be less and when combining a 160mm+ lens on a DSLR, perfect Depth of field is virtually impossible. This is a principle of physics.

This old baen was photographed at F16 using a 80-200mm lens at 140mm. Notice the inability to make the background perfectly sharp
After reading this article, when in the field, try attaining a sharp image front to back with a 200mm lens on a DSLR. You will quickly see that it is impossible, due to the way the plane of the lens lies on the camera. It’s nothing you did wrong as long as the majority of the image is in focus. I’ll discuss options to attain DOF when using long lenses later.
CHOOSING APERTURE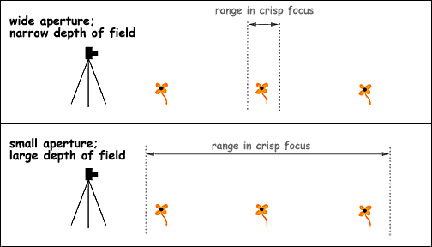
I’ll try making this as simple as possible, but you need to understand exactly what aperture is, in order to be successful attaining proper Depth of field.
The aperture setting refers to the hole that the light passes through when the shutter opens, similar to the iris in our eyes. You can change this setting in camera. These settings are referred to as F stops. F-stop is the focal length divided by the diameter of the lens. F stops are typically written as F/4 etc.. meaning focal-length over 4 or focal-length divided by four.
Each F stop one lets in 1/2 as much light as the previous one. The progression of F-stops, 1 – 1.4 – 2 – 2.8 – 4 – 5.6 – 8 – 11 – 16 – 22 – 32, are powers of the square root of 2.
In the field, you decide on how you want your image to appear. Do you want the image to be sharp front to back or do you want a sharp subject and less sharp background. If you make the decision to make the background less sharp, to accentuate the subject, what level of “unsharpened” do you want the background to be? (This is why we need to think when we photograph… slow down and calculate what you are trying to attain in each image).
Think about this…Not all great landscape images are shot at F22 !
Aperture setting dictates what shutter speed you have. F8 at a 125th sec is exactly the same exposure as… F at 11/ 60th … or … F5.6 at 250th sec… however the aperture (F stop settings) determine the depth of field.
Which do you like?.. It’s really up to you!
Considerations:
1) On a windy day, shooting at F16 or F22 can you attain a shutter speed high enough to freeze the blowing grasses?
2) If a scene is too dark and you need a large Depth of field (F22) meter open enough to focus, then adjust the shutter speed for the aperture you want.
The rule of thumb is, the larger the F stop (F16), the smaller the aperture, and the more Depth of field you have. Conversely, the smaller the F stop (F4), the larger the aperture, and the less depth of field. Yes, there are counterintuitive to our thinking but you’ll get used to how these setting work pretty quickly.
SETTING THE DEPTH OF FIELD
I strongly recommend that nature photographers use only two modes to make photographs on their camera. These are the manual mode or aperture priority mode
I strongly recommend that if you do not have a camera with a depth of field preview button, look to upgrade to one that does. This button is invaluable… What it does is that it stops the lens down to the shooting aperture and shows you, through the viewfinder how the depth of field will appear in the photograph. Without this button , when looking through your lens you’re looking at the widest aperture the lens will provide, not the depth of field that the aperture setting you’ve chosen will represent.
Note:—if your camera is set in the AUTO FOCUS mode——your camera will negate all your hard work setting the DOF manually. A while ago, I was conducting a workshop and a participant asked why when he focus correctly, and uses his Depthof Field Button (DOF) to check his DOF and his images still turn out blurry. Well he had his camera set to auto focus, and when he pressed down on the shutter release the lens went into auto focus mode, thus canceling out all the work he did manually to create the image he wanted.
Here is an easy technique to make images sharp from front to back, (remember this is a discussion when using lenses under 60mm!)
“OK, AT F16 my viewfinder is so dark when the DOF button is pressed that I can’ t see the image, let alone the adjust of the depth of field”
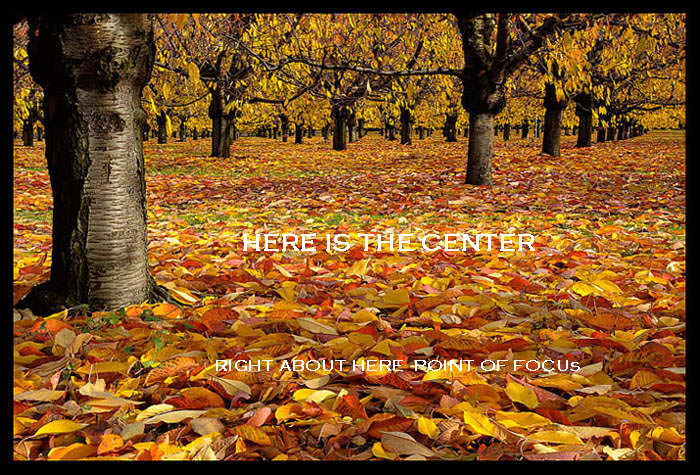 At small apertures like F11, F16 the viewfinder does becomes too dark while depressing the DOF preview button. Here how to make it work!
1) Set your aperture to F8 or to a setting you can see the image through the viewfinder while depressing the DOF Preview button.
2) Focus just above the 1/3 of the way up from the bottom of the frame on a subject closest to you, and then fine tune the focus, looking into the image itself, checking the background for depth of field.
3) If this area is in focus, you have a great chance of the entire image being in focus when resetting the aperture to F16, or even F22
4) Having done that accurately, I the reset my aperture to F16 or higher and make the photograph
5) Some cameras have a zoom capability in playback. Zoom in, using the LCD on the back of the camera on the background to check for sharpness.
To make a photograph using a subject that is sharp with an unsharp background you must
1) Use your depth of field preview button to focus on the subject
2) Set your aperture where you want it to attain the desired background, probably less than n F8
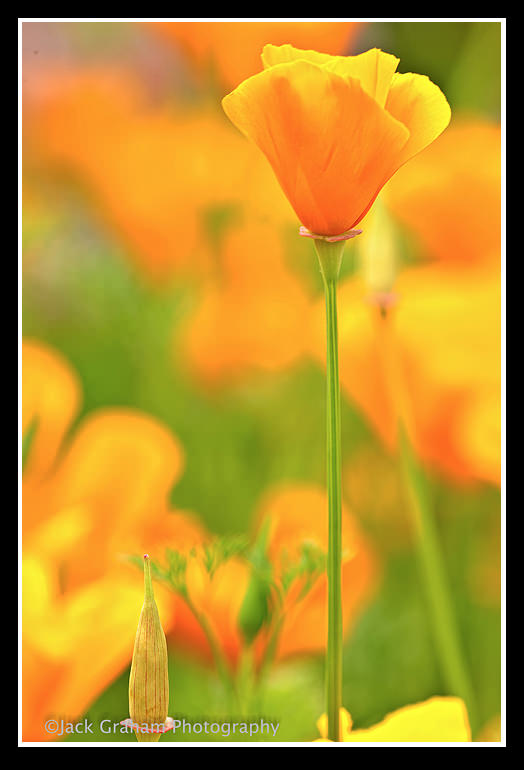
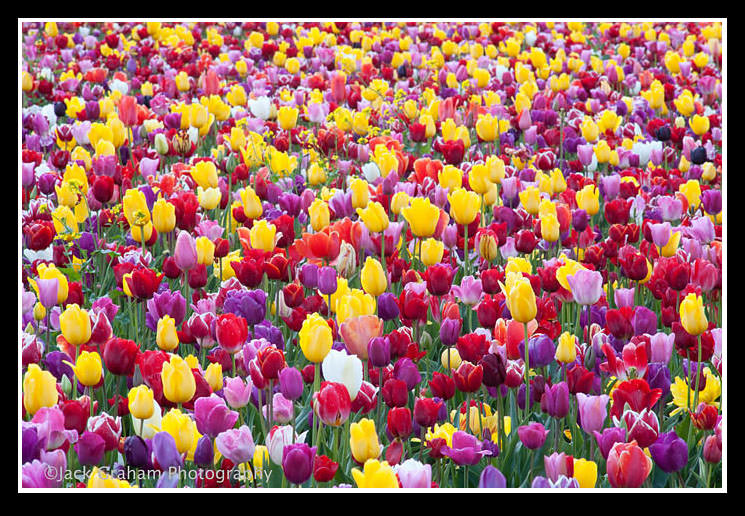
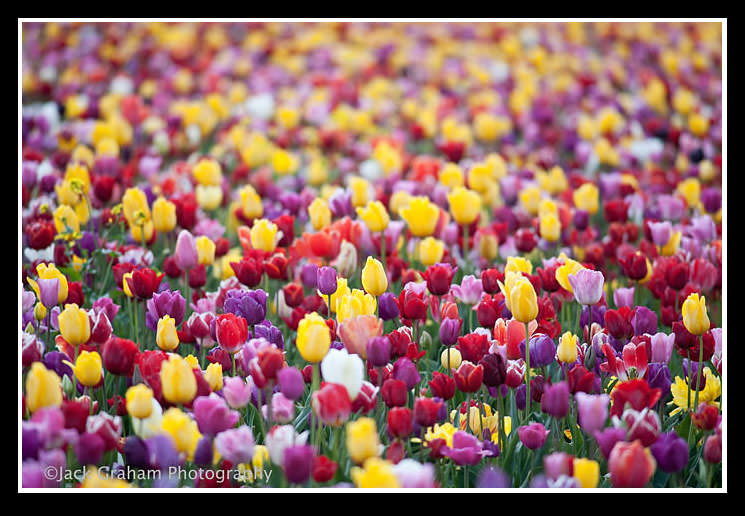
To me this technique is a bit easier than having the entire image in sharp focus. I love photographing wildflowers with a long lens (300mm) to really make the flower the subject stand out, and make the background unfocused.( the longer the focal length lens, the more you can really make the background blurred out.).
OTHER HELPFUL HINTS to ATTAIN PROPER DOF
1) There is a program available called Helicon Focus. Helicon Focus is a program that creates one completely focused image from several partially focused images by combining the images (you can use an unlimited amount of images) into one focused image. The program is designed for macro photography, micro photography and hyper focal landscape photography to cope with the shallow depth-of-field problem. Helicon Focus also aligns images as objects often change their size and position from shot to shot. This function is especially important for macro photography but works quite well in certain conditions in landscape photography as well. I am very impressed on how easy the software is to use. The software can be downloaded right off the web site www.heliconsoft.com.
It’s been my experience that you really need to know in advance, in the field if you will be shooting using the HF program. Not all images will lend themselves for Helicon Focus. Any movement at all will ruin the otherwise great results. This is a good tool to use when using longer focal length lenses, however all lenses qualify if the criteria of: 1) light not changing and 2) the subject matter is not moving is met.
 2) Not too long ago, lens manufacturers used to include depth of field guide marks on their lenses… but not any more. If you would like a handy little replacement for these marks, something that will let you can download Depth of Field calculators and determine the settings and effects of different focal lengths and aperture settings via the web and smart phone’s. I do not use these.(I’ll explain later)
3) I’ve seen folks with a depth of field calculator. I don‘t know who makes it but it’s a wheel that after you put in your aperture & shutter speeds, it will tell you how many feet out you need to focus. Again unnecessary.
Why do I think # 2 & 3 are unnecessary? Probably sometimes when the light is constant and you do have the time to figure these applications out they might be useful. Consider these 2 factors; 1) are you capable of gauging exactly how far, say 23 feet is from your camera? I don’t think I can. I may be at 24 or 22 feet or even further away from the target. 2) More importantly, during sunrise, sunset, the light is changing, you don’t have time to be there holding your smart phone, changing the aperture with the light, seeing out a reading that you probably can’t be accurate on anyway. You’ll miss the shot, or get it wrong. Try the method of focusing 1/3rd up from the bottom, it will work very accurately, once you get used to it.
4) Look into shooting large format cameras. These cameras, because of how their lenses work in relationship to the camera, and some other factors, will attain a large amount of depth of field using longer focal lengths.
Understanding and using these techniques are primary in your ability to make images the way you desire. Like anything else it takes practice and understanding of the concepts.


