2011 Workshop Schedule https://www.jackgrahamphoto.com/2011-workshop-schedule
Reg Forms & FAQ’S REGISTRATION FORM 2011v9 FAQ’S
2012 Workshop Schedulehttps://www.jackgrahamphoto.com/2012-workshop-schedule
Reg Forms & FAQ’S REGISTRATION FORM 2012v5 FAQ”S
WORKSHOP DISCOUNTS WORKSHOP DISCOUNTS
Jack’s Website www.jackgrahamphoto.com
PODCAST: www.18percentgraymatter.com
–COMING in 2012-–I will be doing a special workshop on Whidbey Island , Washington May 10-13 2012 with the folks at the PACIFIC NORTHWEST ART SCHOOL (www.pacificnorthwestartschool.org). I am really proud to be included as one of the faculty of photographers in their 2012 schedule.
In addition I’ll also be offering a 3 1/2 day Napa Valley, Northern California, California Coast & San Francisco workshop in September 2012 for the Pacific Northwest Art school in They don’t have their 2012 info up yet but I have some on my web site
_______________________________________________
My new E-BOOK “IN ALL WE SEE” is now available for purchase and instant download on my website.(series 2)
https://www.jackgrahamphoto.com/shop/e-books
This is a very special 80 page, image filled e-book dealing with learning to see and create top notch images. Some of the topics included are listed below. Please let me know how you enjoy it. I hope it can help you become a better photographer!
…………..10 Commandments of Nature Photography
…………..Seeing and Making Successful Images —
4 Photography Essays
Photograph Less and See More
6 Steps to Make a Great Photograph
What to do when you are just not seeing an image
Photographers vs. shooters
……….5 MAIN Reasons that IMAGES SUCCEED……… or don’t!
………. Photographing Sunrise and Sunsets
………..Creating Mood, Motion and Emotion with Water
………..HDR: The Good, the Bad and the Ugly
______________________________________________________________________
PROPER USE OF GRADUATED NEUTRAL DENSITY FILTERS: —-
Recently Lightroom introduced a ND filter into the software. It is a great addition and work well. However, I still see the need for getting it right when the images are made. You have more control in your digital darkroom when you use grad nd’s correctly in the field. At some point I think that the software folks will perfect the ND, but for now, I recommend the use of grads in the field, then maybe tweaking the images if necessary using software.
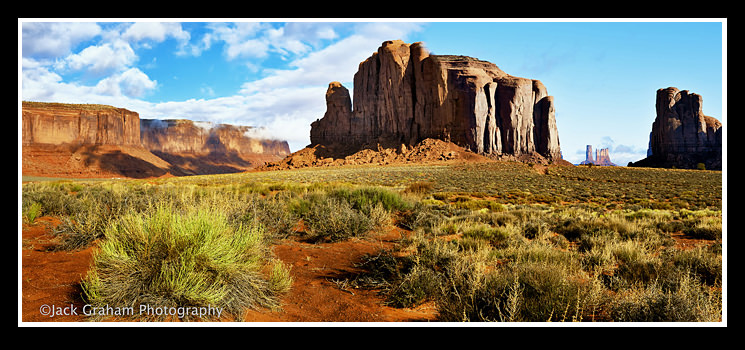
Those folks who take my photography workshops have seen how the proper use of these filters can make an image that could not have been photographed with the results as seen below.
There are only 2 filter companies making these that do not cause color shifting. One is Lee Filters and the other is Singh Ray Filters. ( www.singhray.com)
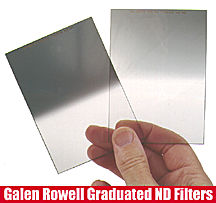 The Singh Ray filters are by far the more wildly used grads by pro nature photographers available. You can but them direct from Singh Ray www.singh-ray.com .
Singh Ray Filter Information:
- Developed with renowned nature photographer Galen Rowell
- Allows you to seamlessly “hold back” bright sky 1,2, 3, or 4 f-stops to balance foreground exposure
- Available in “hard step” or “soft step” types…see photo at left
- Absolutely neutral in color with superior optical integrity
- Made from CR-39 Optical Resin
- Long 84x120mm filter (P-size) allows adjusting for any horizon position
- Also available in four other sizes
- Custom sizes and densities available upon request
If you only can afford 2 filters….—buy the 2 & 3 stop “graduated” filters.
Use of graduated neutral density filters is not as easy as it seems. However, my success rate of “keepers” has gone up at least a thousand percent since I first bought a cheap neutral density graduated filter in the seventies and began experimenting with it to make photos that I hoped would more closely record the colors and tones I naturally saw. I soon discovered that, as with all good things in life, there is no free lunch….“Each Galen Rowell Singh-Ray ND grad in the set… serves a different purpose. When I go light and carry just two, I choose two that has a soft, gradual shift from clear to a two-stop gradation (2-stop soft) as well as a 3 stop soft. Sometimes I carry a 3 stop “hard” which abruptly changes from zero to three stops across only five percent of its area (3-stop hard) for typical use across straight horizons in sunrise or sunset situations. On serious photo assignments or personal expeditions I feel naked without my full set of ND grads

Sunrise on the Columbia River… using a combination of a 2 stop = 3 stop soft grads from Singh Ray, essentially making this a 5 stop soft ND grad.
HERE IS HOW I USE A GRAD ND FILTER
MANUAL METERING:
1) Meter and determine the correct exposure for a medium tone subject in the foreground.
2) Meter the BRIGHTEST HIGHLIGHT area of the scene and compensate for its tonality. Compare the reading from the reading taken on the medium tone… this will tell you how strong an ND filter you need in order to hold back the highlight area to keep it in an acceptable range.
3) Use the highlight exposure, and then open up by the strength of the ND filter you are using. The highlight will bring the highlighted area back within this range.
4) You can use a COKIN “P” adapter, fitted to the threads of your lens, or carefully handhold (it takes a lot of practice) and position the ND filter while keeping in mind that the darkest part of the graduation is where the most pronounced effect will take place.
5) Make the image
Another word about filters—It always amazes me how folks buy very expensive lenses and use cheap filters putting so-so glass in front of them. For a polarizer, I would highly recommend the Nikon’s. Almost as good are the B + W’s. B + W’s are my filters of choice for all (other than Nikon Polarizer’s) they can be purchased via HUNTS!!! ![]()



[…] More information is found below, in yesterdays post http://jackgrahamphoto.wordpress.com/2011/10/05/proper-use-of-graduated-nd-filters-new-e-book-now-on… […]
[…] These filters are made to equalize light from overly light areas to normal or even dark areas. They are commonly sold in increments of 2, 3, or 4 stops. They gradually, from top to bottom, start out at their darkest and blend into clear. Though one could take 2 images and blend them together, getting it right with a GND is my choice. When combining images often noise is introduced into the image. Also when the light is changing fast, blending images can produce some interesting but unwelcomed effects. A good article talking about using these filters can be found HERE […]