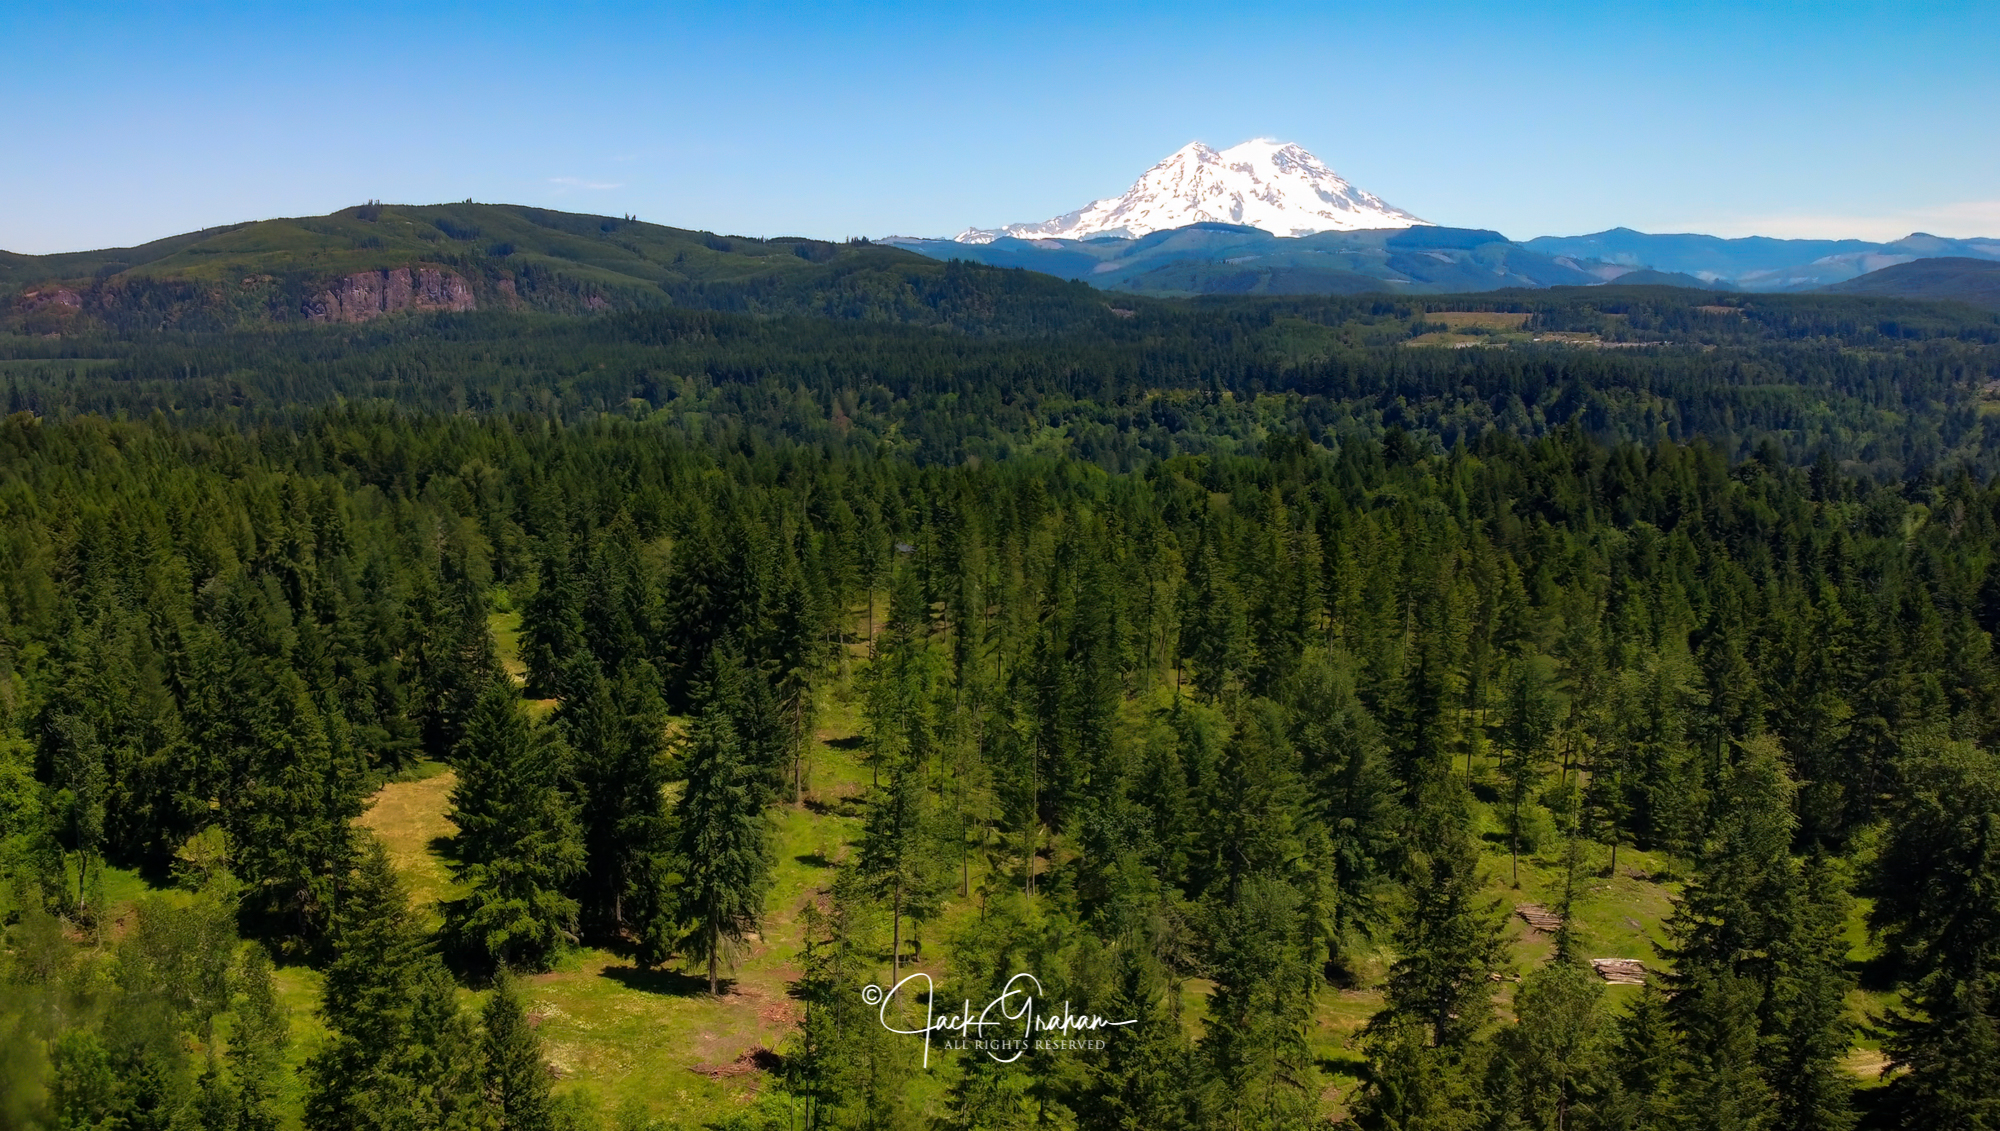
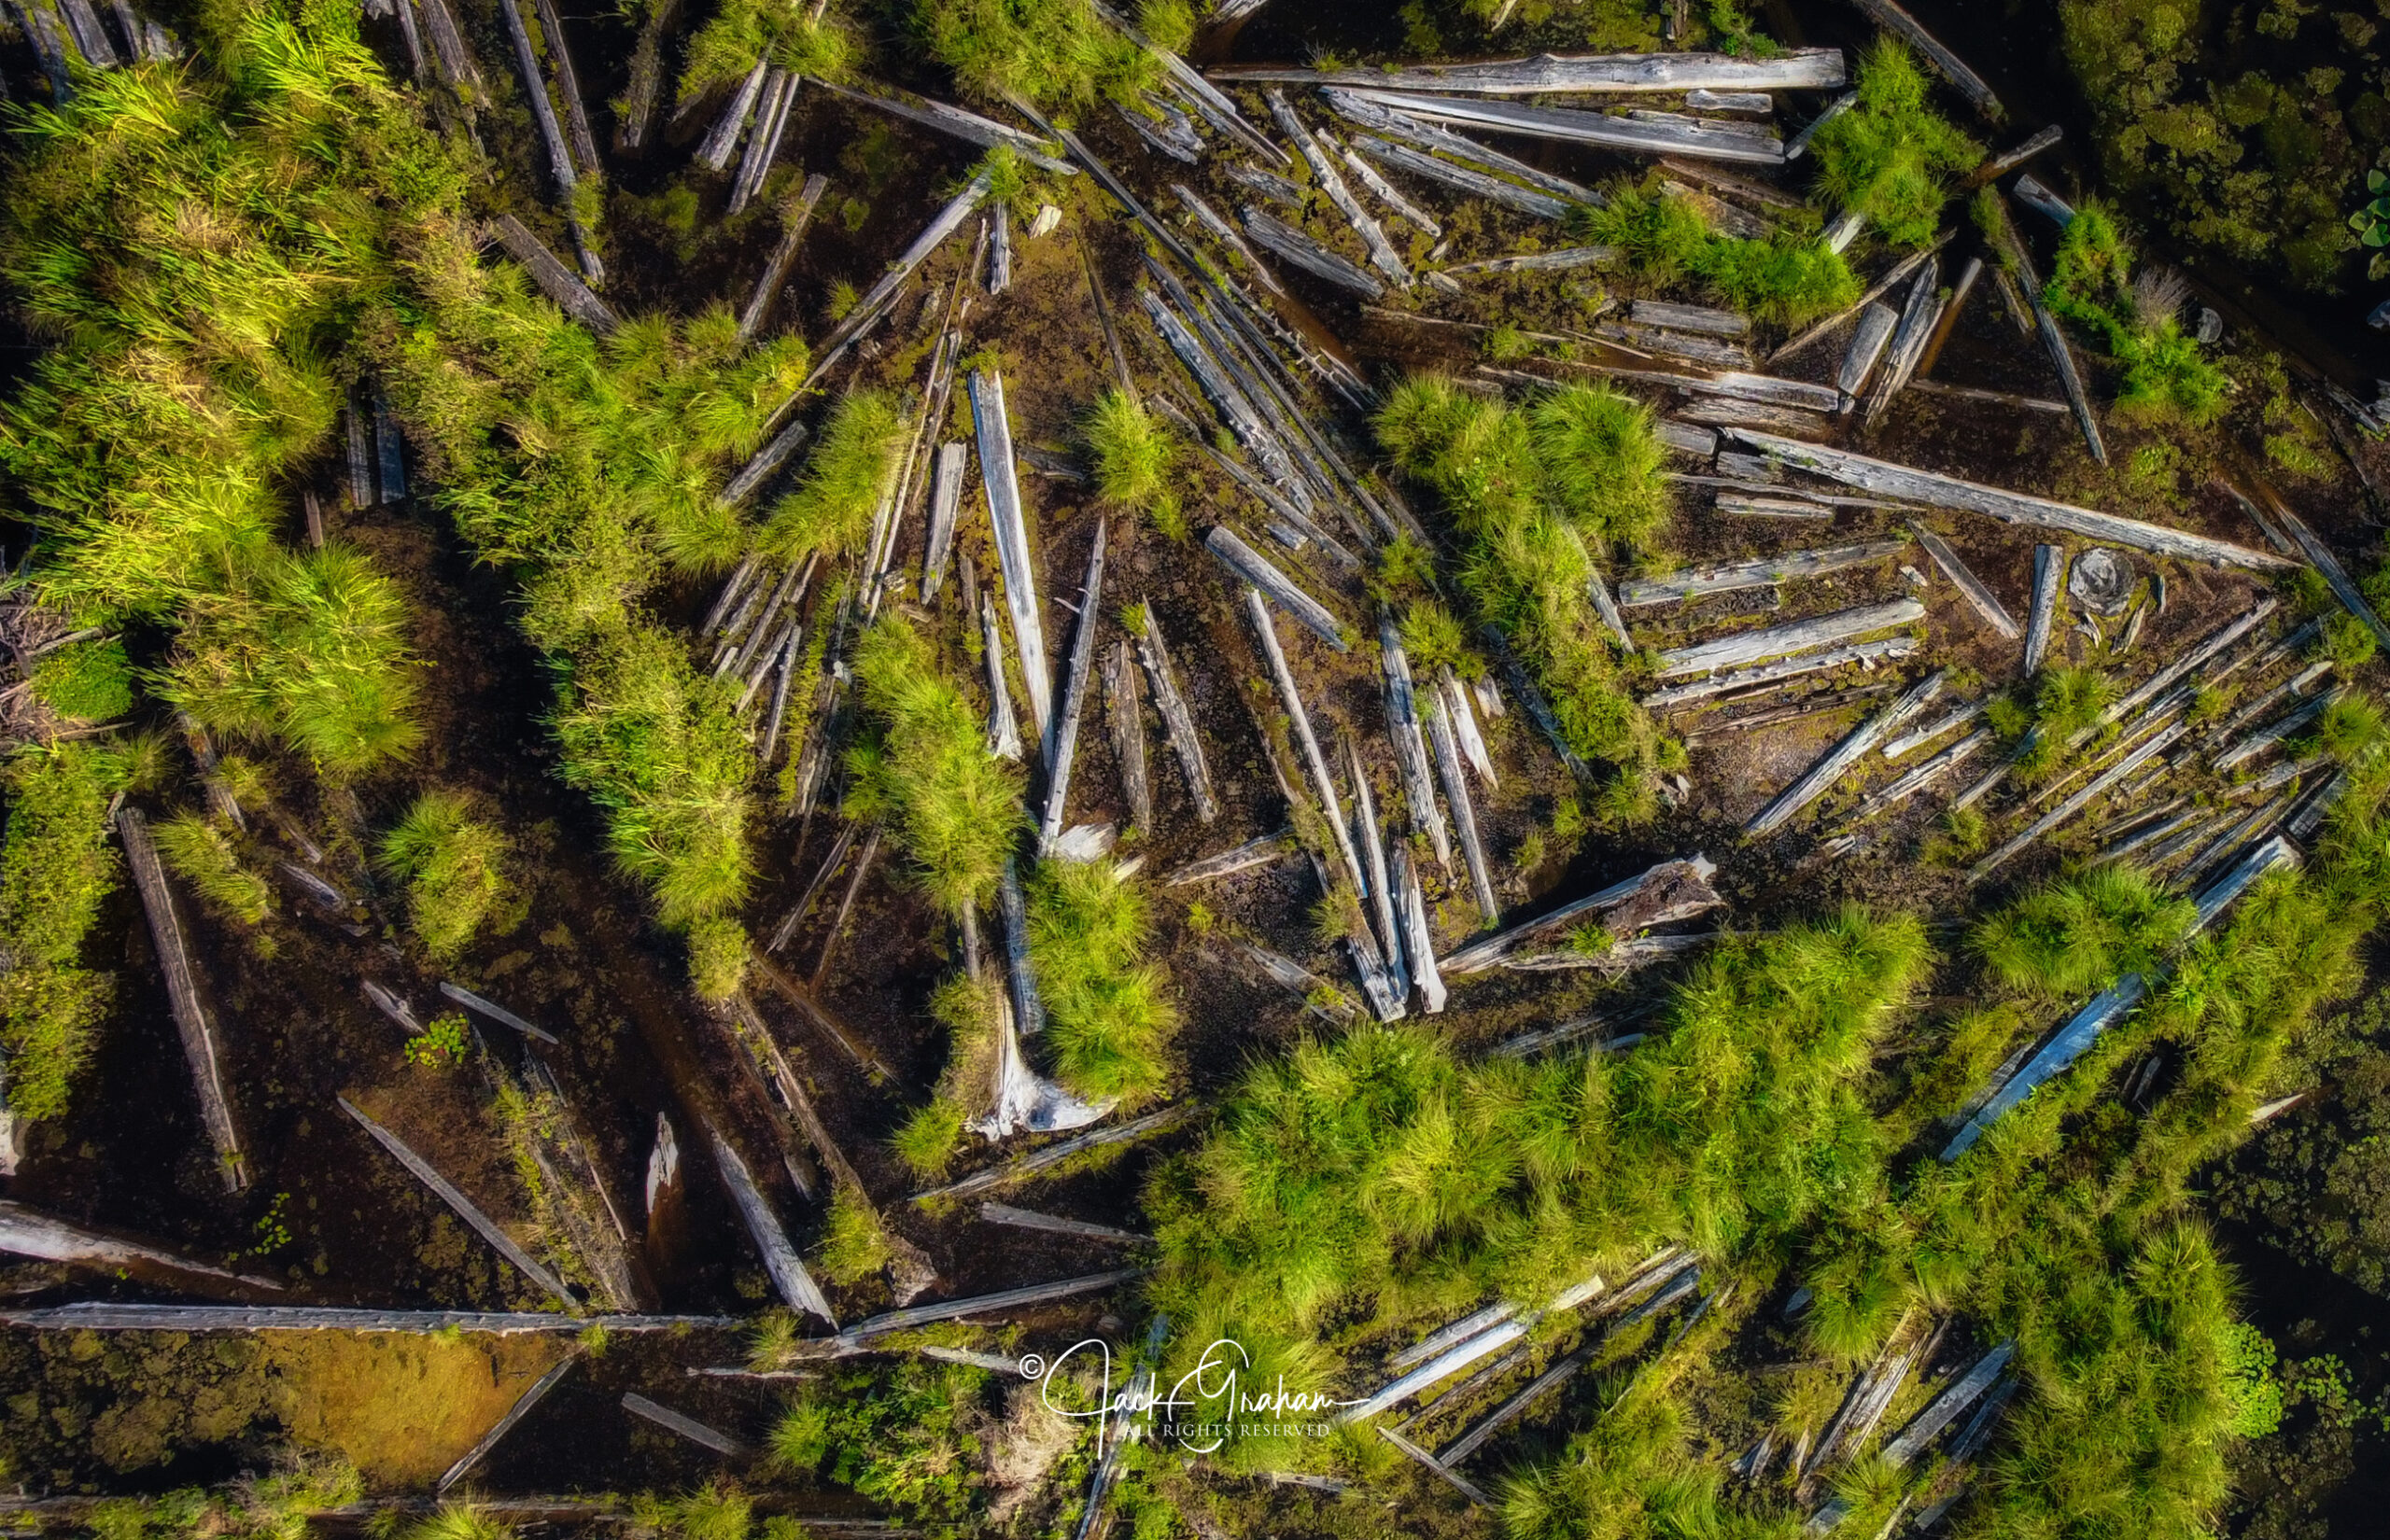
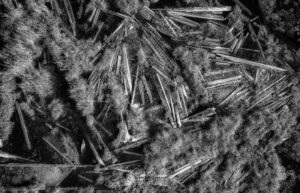
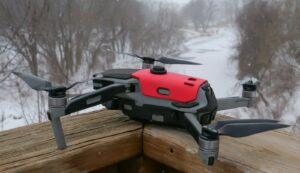
© Jack Graham/ Jack Graham Photography All Rights reserved
Below is a “SHORT VERSION of our E-BOOK on how we prepare, fly and deal with videos and images.
To DOWNLOAD the complete 42 page document.. click DRONES_FINALv4. Yes, its free!
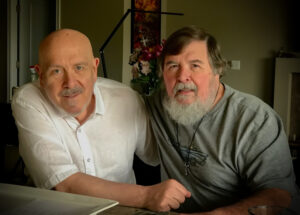
By now you probably are wondering, “Where is Part One?”. My dear friend, consiglieri, workshop partner and over all amazing person, Bill Fortney has already done this exceedingly well on his blog. There is no need for me to repeat this. It’s all there and very informative. Click HERE to read to access Bill’s article. Please read his before reading this blog entry. After that, here, I’ll talk about some BASIC BUT IMPORTANT things I use and ideas on flying drones that will certainly help you. There’s a lot more to learn, but between Bill’s Article and this one perhaps we’ll get you some much needed, important tips and information.
Bill and I decided to shoot Fuji cameras before each other knew it. That’s a story for another day. We both choose the same drone the same way. I also fly the Dji Mini2 for all the reasons Bill talked about. Almost of everything here in this writing, pertains to the Dji Mini or Mini2. There is much overlapping of information for other drones.
Flying drone is great fun. It’s so interesting to see a totally different perspective when flying your drone, but there are some important things to consider before learning to fly.
BEFORE YOU FLY
One other interesting thing is that the Mini 2 weighs 249g (0.55lbs), takeoff weight. However, you still need to obey all rules governing drones as well as (un the United States) a part 107 certificate to fly commercially. In other countries like the UK, you still need to register all drones if they have a camera. It’s important to be aware of this if you travel. HERE is a good article on Drone Regulations in the United States.
However, you still need to get a drone “TRUST Certificate”. It’s easy.
For hobby flights: You need your TRUST certification
For commercial flights: You need your Part 107 certification
Basic drone flight guidelines in the United States
- Fly at or below 400 feet above the ground
- Always fly within line-of-sight. If you can’t see it, bring it in
- Stay away from airports
- Stay away from other aircraft – they have the right of way in the air
- Do not fly over people
- Do not fly over or close to sports events or stadiums
- Do not fly near emergency situations such as car crashes or fires
- Do not fly under the influence
- Be aware of controlled airspace – use the B4UFly app, request airspace authorization before flying in certain areas
So how do you know if where you are flying you are “Good to GO”?
There are many websites and apps that will give you this information. All recommendations here have both website and apps that you can search for on your mobile device.
 All drones work using a mobile device (Phone tablet etc.). I use an app called DRONE BUDDY to check my locations It also have basic weather as well. It will detect your location and let you know if you are good to fly. The weather can play havoc with drones. Winds and moisture are things to avoid, especially until you become proficient in flying.
![]() B4UFLY is also a good APP (by the FAA) Click HERE for more info
B4UFLY is also a good APP (by the FAA) Click HERE for more info
The best drone weather information application for me is:
 UAV FORECAST (UAV means Unmanned Aerial Vehicle). If you pay for the premium edition the forecasts run a week out.
 MAVIC PILOTS; You drone manufacture probably has good information on locations and weather as well. Additional they (especially DJI) have some good forums that I recommend joining. You’ll gain knowledge and hear about trends, new products etc. MAVIC PILOTS is one I highly recommend.. DRONE RUSH is a great website with lots of pertinent information.
- This article (Click HERE) is great on explaining all the set-up procedures and what you need to know to be safe and learn your drone easily).
- ___________________________________________________________________
LEARNING TO PRE-FLIGHT
Did you ever seat by a window on a commercial jet and see the pilot walking around looking at the airplane. He or she is doing a pre-flight. They do the same in the cockpit.
You must get in the habit of doing the same with your drone.
- Check the flying and weather conditions. Make sure you check visibility and environmental factors. Do not fly in precipitation unless prepared with a WET SUIT (read on!). Thick clouds can disrupt communications
- Secure the necessary documentation before drone operation. (You cannot fly in National Parks, many State Parks and other areas—study where you can fly and know and comply with specific drone operation laws in your area.
- Ensure if the drone is fit for flight (batteries charged, SD cards have enough space, firmware up to date etc.
- Mobile Device charged and used the latest apps
- Plan your flight. What are you trying to video/ photograph?
- Study the terrain and possible obstacles.
- Review the flight rules: basically….
Fly at or below 400 feet above the ground
Stay away from airports
Stay away from other aircraft – they have the right of way in the air
Do not fly over people
Be aware of controlled airspace – use the B4UFly app, request airspace authorization before flying in certain areas
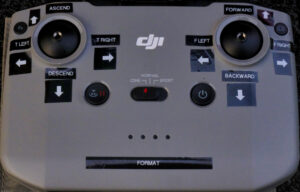 I used a label maker to make labels for my controller with the functions that each controller performed. In my early days of practice this came in handy. You will see that over time you won’t even look at the controller when flying, but in the beginning labeling the controls was helpful and kind of a security blanket!
(The word FORMAT is there to remind me to FORMAT my memory card after downloading files and flying again.)
There are many other functions you need to set on your controller. The drone manual will walk you through this. As well you can access THIS VIDEO for some good information on basic flight control. THIS article is also a good reference for what you MUST set before you fly…(Flight max, Flight distance, height, Camera Settings etc.)
____________________________________________________________________
Adjusting your Pitch & Gimble Settings
 First, I recommend getting familiar with the DJI FLY APP. You can check the drone’s status, update firmware, and customize your settings.
There are 3 modes on the Mavic Mini 2 (and most other DJI Drones):
Cine-– Cine is the ideal flight mode for shooting stunning, cinematic footage. Mavic Mini’s rotational movement is slowed, and its control sensitivity is increased, ensuring you shoot the smoothest, most stable footage.
Normal — Position mode is the default flight mode for your drone.
Sport— Sport mode is designed for flying your drone with maximum speed and maneuverability. Users tend to use this mode for traveling quickly to points of interest for shooting photos and video. Make sure you use only use this mode in a safe, open area to experience just how fast you can fly!
You can adjust these settings. (Faster and slower speeds of the GIMBLE (camera PITCH up and down) and YAW (direction the front of your is facing when rotating either clockwise or counterclockwise (or left and right if you prefer) on its vertical axis.
Access ADVANCED GIMBLE SETTINGS (ON Mavic Mini only). It is easy to customize these setting to your own taste, However I recommend watching THIS VIDEO to clarify how to, and what the setting mean.
Pitch is controlled by the wheel on the back left side, usually by your left index finger)
PITCH SPEED= the higher the number the faster the gimble(camera) goes up and down), For good cinematic photography you want a slower more gradual movement.
PITCH SMOOTHNESS=The higher the number the smoother the movement will be when you let go of the wheel and stop the gimble(camera) from moving. ), For good cinematic photography you want a slow motion and have the gimble(camera) stop as soft as possible.
YAW is controlled by the Left controller (turning the drone to the left and to the right.
YAW SPEED=The higher the number the faster the drone will turn from left to right or right to left. You want this to be slower than normal for quality video.
YAW SMOOTHNESS=The higher the number the smoother the drone will stop when turning from left to right or right to left. You want this to be slower than normal for quality video
THESE are great videos that explains these settings. Practice and find the setting you like. VIDEO 1 VIDEO 2
I ALMOST ALWAYS FLY IN CINE MODE!
MY Settings are as follows (just what I like)
NORMAL CINE SPORT
PITCH SPEED 25 8 40
PITCH SMOOTHNESS 25 25 25
YAW SPEED 30 12 60
PITCH SMOOTHNESS 70 80 40
_____________________________________________________________________
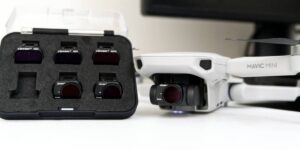
- FILTERS
 Yes, you need filters for your drone. I am a firm believer in putting good filters on good lenses. The same goes for drones. Unfortunately, the best filters available for drones are from Polar Pro (same folks who makes my Tablet mount—see below). The filters I (we) use from companies like Breakthrough Photography, Lee, B + W etc. do not make drone filters yet.
Unfortunately, Polar Pro does not make a filter system for the Mavic Mini or Mini 2 as of this writing. (Air 2s, FPV, Mavic2, Mavic Air2 and Inspire drones all can use filters from Polar Pro).
As with regular photography, two of the most useful filters for drone photography are circular polarizer (C-POL) filters and neutral density (ND) filters.
A great article on drone filters, why and how etc. can be found HERE. I recommend you read, print, and study it.

WHY a POLARIZER and a ND FILTER?
- A polarizer removes or reduces glare and reflections and helps capture full color depth due to reducing glare.
- Much of the subject matter includes large areas of surfaces that can be reflective
- Neutral density are vital filters for drone photography and videography because of the limited range of exposure options in many high-end photographic drones.
- Neutral density filters will allow you to get back into moderate shutter speeds and apertures to take advantage of the sweet spot of the lens and for a more natural appearing video feed with a slower shutter.
- ND4 reduces light by 1/4. An ND4 filter can reduce 2 stops of light, allowing you to slow the shutter speed from 1/100s to 1/25s.
- ND8 reduces light by 1/8. An ND8 filter can reduce 3 stops of light, allowing you to slow the shutter speed from 1/200s to 1/25s.
- ND16 reduces light by 1/16. An ND16 filter can reduce 4 stops of light, allowing you to slow the shutter speed from 1/400s to 1/25s.
As with regular photography, two of the most useful filters for drone photography are circular polarizer (C-POL) filters and neutral density (ND) filters.
A great article on drone filters, why and how etc. can be found HERE. I recommend you read, print, and study it.
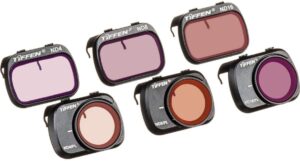
 I use the Tiffen 6 filter ND & ND Polarizer Kit.
Click HERE to purchase.
I tried the set from Skyreat but found quite a step up in the ones from Tiffen
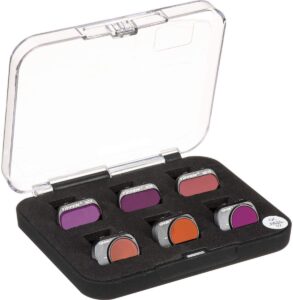
QUICK GUIDE to ND FILTERS:
ND4 Sunrise, Sunset, Early Mornings and Evenings
ND8 Overcast sky, Daytime, Noon direct sunlight
ND16 Scattered sky (partly cloudy), Noon, Direct sun exposure
ND32 Clear Sky, Noon, Direct sun, Very Bright surroundings
ND64 Extreme bright surroundings (Desert, snow) … noon time
- I suggest you experiment with your ND’s You’ll come to your own conclusions and fine tune when and to what strength you use them.
THESE are great videos that explains these how to use ND and polarizing filters
____________________________________________________________________
MORE ACCESSORIES
Much like photography, drones offer a myriad of accessories.
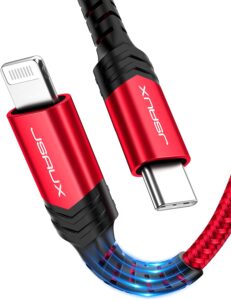 CABLES: Depending on the mobile device you use; the cable may need other longer. I th MAVIC remote uses a USB-C to Lightning (Apple) cable. WARNING: ALL AFTER MARKET CABLES ARE NOT ALIKE). They must say “【MFi Certified】: USB C to Lightning Cable has completed MFi certification requirements. The Apple MFi certification ensures the safety of your Apple devices even when fast charging at the highest speed.
If not, they will not work. I recommend either buying the cable from your mobile device manufacture (APPLE etc.). I have purchased cable d from JXAUX on Amazon. They work great.
HERE is the link to JXAUS. I also use cables from APPLE.
…. Like everything else—always carry a backup cable or two!
 THUMB STICKS. I use these from HANATORA. They are a bit taller than the ones that come with the remote controller as well as height adjustable. Doe $12.99 I think these make a difference, at least for me.
Click HERE for more information and to buy.
![]() I recently purchased these “Cine Sticks” from ScottyMakesStuff.com I have not received them yet but I bet they will be even better. Controlling the drone is primary and anything that helps is important to me.
I recently purchased these “Cine Sticks” from ScottyMakesStuff.com I have not received them yet but I bet they will be even better. Controlling the drone is primary and anything that helps is important to me.
Click HERE
They are made by Scotty in Australia!
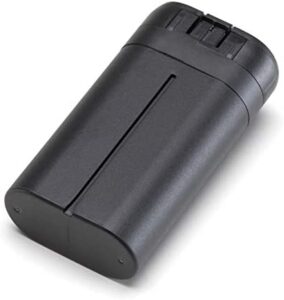 EXTRA BATTERIES: Model dependent! Yesterday, I flew quite a while and went through all 4 batteries I have. Each battery for my Mini-2 lets me fly up to 31 minutes. However, at about 20 minutes the system tells me to return “home” as the batter level is low. Buy extra batteries. I would recommend only buying the ones from the manufacture.
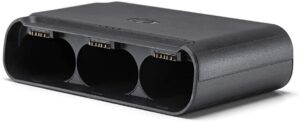 You will need to charge batteries often. By using THIS CHARGER from Mavic I can charge 3 batteries without exchanging them. It takes a good ½ or so per battery.
Don’t leave home without a few charged batteries!
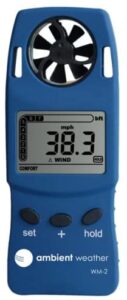 I carry a small handheld Windspeed meter. It’s the WM-2 Ambient Weather device. Click HERE to see it on AMAZON. Living in the Pacific Northwest and sometimes flying high in the mountains, it’s important to know the speed and direction of the wind. Beware: Winds aloft can be completely different, even 100 feet above your location. The drone will let you know if the winds are too strong. This little gadget let me know wind speed, temperature, wind chill, wind gust, and Beaufort Scale, all in one compact, portable, rugged package. It fits neatly into my drone case. About $30.00
DO YOU WANT TO FLY IN THE RAIN?
Remember bad weather makes good pictures, but moisture can debilitate and destroy your expensive drone. I have purchased THESE “Wet Suits” from Phantom Rain for my Mini 2 . I know I’ll love these. Their website is great and has a lot of videos on their products (Located near Cleveland, OH).
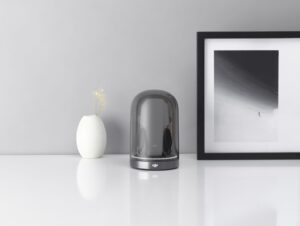
This item is very helpful and looks great. The DJI Charging Display Base a practical way to keep your mini drone charged. It’s sleek. When connected with the DJI 18W USB Charger, the case charges and protects your DJI Mini 2 or Mavic Mini at the same time. Once charged, your drone is beautifully displayed. About $30.00. Click HERE
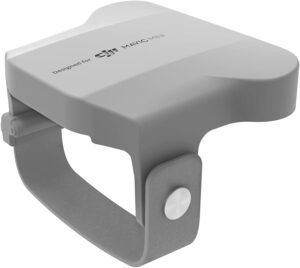 PROPELLER HOLDER: The Mavic MINI 2 and other drones come with a holder, however the one I found is easier to use (just a little) than the one that comes with the drone. Click HERE, about $15.00
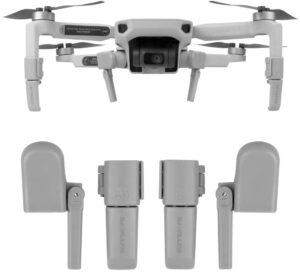 LANDING EXTENSIONS: If you are not landing on even surfaces you can improve the drone’s ability to adapt to the ground environment during take-off and landing and avoid ground debris to less contamination or damage to the lens filter and gimbal. If you feel good about landing on the
STARTTEC Drone Landing Pad 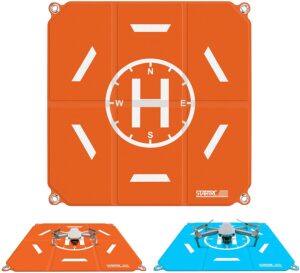 then you don’t really need the extensions.
Click HERE for the landing extensions, about $15.00
 HOW I CARRY MY DRONE
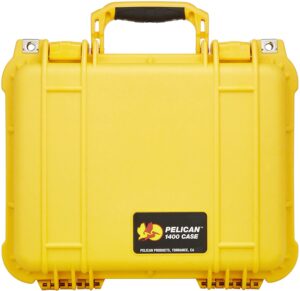
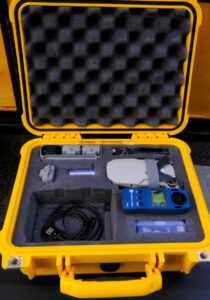
Certainly, when I fly and can’t carry everything I want or need I’ll fit by drone into my camera bag (Batteries need to be in your checked luggage). However here at home and locally, I carry my drone, batteries, remote controller, ND filters etc. in a Pelican 1400 Case. Pelican’s Pick N’Pluck foam lets you customize the interior. It’s watertight and comes in yellow, black, and Orange.
HOW I MOUNT MY iPad Mini to the MAVIC REMOTE CONTROLLER.

First, I tried my iPhone. It was too small. The I tried my iPad, it was too big and heavy, so I purchased an iPad Mini. It’s just perfect.
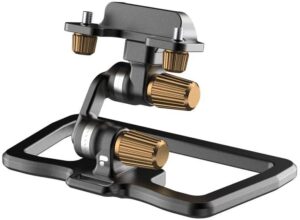
I use a slightly different tablet mount system than Bill. Both works extremely well. The one I use the one from Polar Pro. Its Stainless Steel and Aluminum. About $ 125.00, not cheap but worth the price. I love the three control knobs to set to the perfect angle of my iPad Mini properly as I choose it to be.
- QR Plate System enables you to quickly switch monitors from Crystal Sky to Tablet to any ¼ 20 mount in less than 2 seconds
- Full Metal Construction – Combining both Stainless Steel and Aerospace grade Aluminum the Flight Deck Base is bombproof ensuring your monitor never slips
- Stainless Steel Tilt Locks provide 256 Slip-Free viewing angles and height adjustments
- Aerospace Aluminum Knobs provide a fully tool less set-up and storage process to spend more time flying and less time fumbling tools around
- Includes: Flight Deck Base, Crystal Sky Mount, and a Tablet Mount
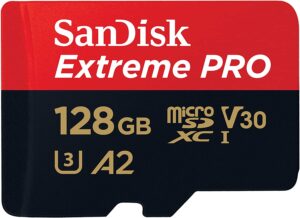 SD CARDS: THEY ARE NOT ALL ALIKE and MAKE a BIG DIFFERENCE
I use the San Disc 256GB Extreme micro SDXC UHS-1 ( V30, 4K) about 40.00 Click HERE
- Up to 160MB/s read speeds to save time transferring high-res images and 4K UHD videos
- 4K UHD and Full HD Ready with UHS speed class 3 (U3) and video speed class 30 (V30)
___________________________________________________________________________
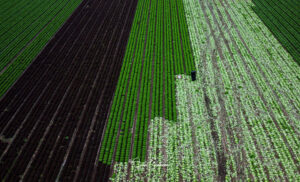
DCIM100MEDIADJI_0012.JPG
MAKING IMAGES and VIDEOS.
Again, there are many tutorials on You Tube regarding making videos and still images (especially Video). Shooting video takes practice. You will learn different flight maneuvers to attain interesting perspective and cool looking videos. Seek these out online. And like anything else, get out and practice. Still images are like shooting your DSLR. Here are some videos with great tips:
NOW YOU HAVE VIDEO’S AND IMAGES FROM YOU’RE DRONE, NOW WHAT?
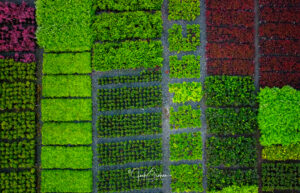
DCIM100MEDIADJI_0002.JPG
You will start accumulating videos and images rapidly. Get your external hard drives ready. 4K videos are quite large. A fast computer helps a lot too!
In the beginning you usually will save every video you shoot. As time goes by you get selective. The same goes for still images.
STILL IMAGES: On my Mini 2 I can shoot RAW and JPEG, just like a regular camera. The JPEGS are 12mp prior to processing. Process them in the same manner as you process your images from your DSLR.
VIDEO is a different story. You can shoot Raw AND REGULAR (mp4) VIDEO. There are many processing programs available for both PC and MAC. Some have some with steeper learning curves than others. What you use is dependent on your own learning curve, and what you are doing with your videos. The Dji app has a processing section for basic processing as well.
You can share your work on social media. VIMEO is a good place to share your images. Uploading is quite easy. HERE is my Vimeo link. (Note not all videos were shot using the drone… the ones not from the air were done using a GO Pro camera or my Fuji Cameras.
GALLERY
CLICK HERE for my latest Images
CLICK HERE for my VIMEO website
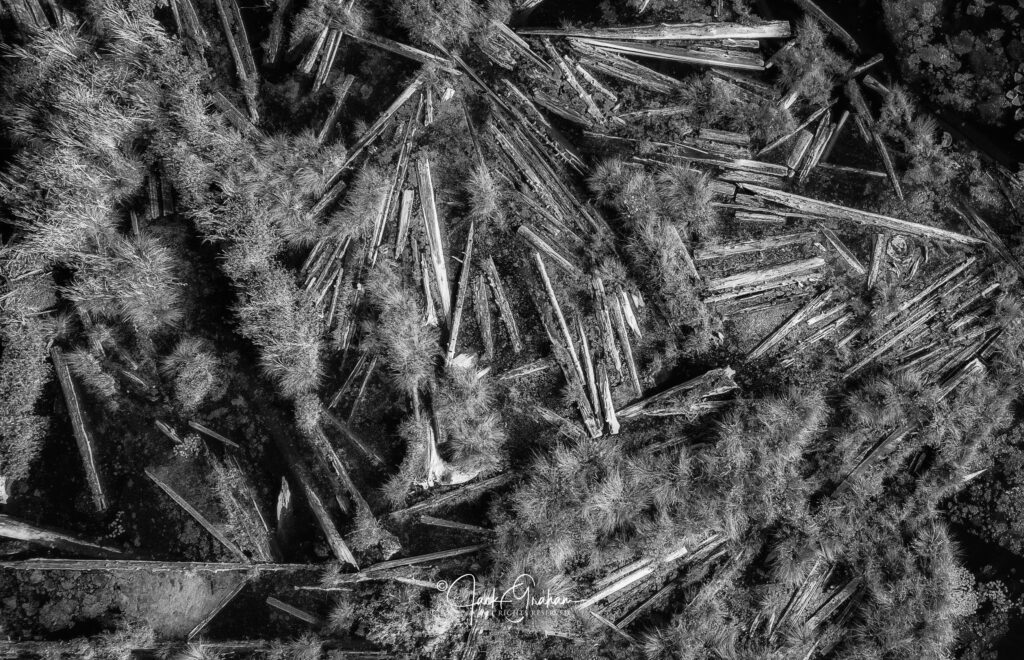

DCIM100MEDIADJI_0003.JPG