MAKING A SHORT STORY LONG … Long Exposure Photography
All Text and Photos ©Jack Graham

Vik Iceland
Long Exposure Photography has become very popular in the last few years. Many of our popular websites and magazines are featuring long exposure photography. Many filter manufactures have also noticed this and have added Neutral Density filters to their offerings.
What is a long exposure? Most of the available DSLR cameras today will allow us to have a shutter speed set automatically up to 30 seconds. However to me a long exposure is just that, longer than I can render a subject in sharp focus. This could be ½ second or a few hours, depending on the effect I want to create.
Long exposure can be applied in several applications. We can leave our shutter open long enough for a car or bicycle to drive by and create an interesting blurry effect.
Long exposure photography is also used in nighttime photography to capture stars patterns, or trails as well as even sharp stars set in the night’s sky. When our cameras are on a good tripod and the shutter is left open for a prescribed time, very vibrant and clear photographs can be made.
Long exposures can be used in light painting, when a scene is very dark. A light source is moved over the subject to add some light and ambiance. Often we need to experiment with the amount of light applied to a subject as to not over do the amount of light shining on our subject.
Finally the most often used application of long exposures for me is with moving water and clouds. The end result is often a mysterious, yet dreamy effect and sometimes even surreal. We can at times add a sense of movement by recording the moving clouds or water across our image. In essence this is a departure from normalcy both from an artistic sense, as well as a viewing experience.
In this essay, I am going to deal with long exposures using clouds and water in landscape photography.
CREATING LONG EXPOSURES
EQUIPMENT
Bandon Beach Oregon 23 sec. exposure/ Singh Ray 10 Stop Mor-Slo Filter
First, you will need a good quality DSLR. Long exposures can introduce a bit of noise, so the better the cameras sensors, the better your images will appear. You will not see this noise or what we call “hot-pixels” on your LCD, but they will show up when viewing your images on your monitor. You will also need a camera that has a “bulb” setting. The bulb setting allows you to keep the shutter open for as long as needed, allowing you to create some quality long exposures. You will also need a remote shutter release cable or wireless shutter release. There are many of these on the market, some made by the camera manufactures and some after market. If you are going to be doing serious long exposure photography purchase a release that has a built in timer that you can set for the proper amount of time you require for each individual image. It will be a lot more accurate than counting seconds or even trying to look at your watch in dark areas.
Next, you need a good quality tripod and quality tripod head. When photographing in normal conditions, a tripod is necessary to produce sharp images. When making long exposures a sturdy tripod is even more important. Exposures can sometimes last well over a minute. The sturdier the tripod, the better the results will be. Wind, camera shake etc. will be magnified more and more as you increase the time our shutter is open. As always, I recommend never extending your center column. If you do, you now have a much-unstudied mono pod. I sometimes see folks hanging camera bags from their tripod to try to anchor the tripod. A breeze might move this “anchor” thus making the tripod vibrate. Placing a beanbag on your camera will produce better results.
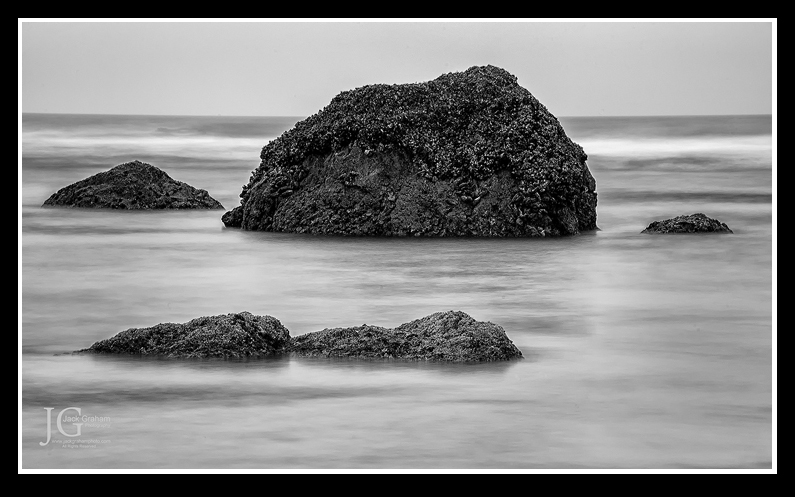
La Push Beach, Olympic Peninsula, Wa / Singh-Ray 2-8 stop Vari ND filter / 9.2 Seconds
Finally you’ll need some filters to slow the shutter down. These are commonly known as neutral density filters. Essentially what these do is block out light allowing the shutter to stay open longer. These filters are rated in “stops” Each “stop” reduces the amount of light on the sensor by a factor of two. For example a 3-stop ND filter, (often referred to as a ND 8) reduces the light by 3 stops (2x2x2=8). A 4 stop ND ( or ND16) reduces the light by 4 stops ( 2x2x2x2-=16) and so on. When using a 10 stop ND filter, the light is reduced by 1024 (2x2x2x2x2x2x2x2x2x2=1024). This translates to the shutter being open for 1024 times longer than without the filter.
Many filter manufactures make these filters and I have tried most of them. These filters are not easily produced. They must be made of high quality photographic glass, not resin. Good quality filters take some time to produce. Unless a manufacturer has an assembly line each filter is almost hand made. The rate of dye that is added to the filter depends on how hard or soft the graduation is.. Quality manufactures try to eliminate color shift as much as possible. This process is quite extensive. High quality filters are also quite expensive, but considering the manufacturing process, they are really priced very fair.
I use two ND filters. I use the Singh-Ray 10 stop Mor-Slor filter and the Singh-Ray Vari-ND filter. Singh-Ray also produces a 5-stop Mor-Slo filter.
The 10 stop filter is a screw in 10 stop filter available from Singh-Ray (www.singh-ray.com ) in many thread sizes. The Vari-ND filter is also a screw in filter but using this filter you can vary the amount of stops from 2-8 stops ( Note: to stack Mor-Slo with Vari-ND, at least one filter has to be standard mount with front threads — two thin-mount filters will not stack).This filter is available currently in 77mm & 82mm sizes. You can view how the Vari-ND works HERE
TECHNIQUE
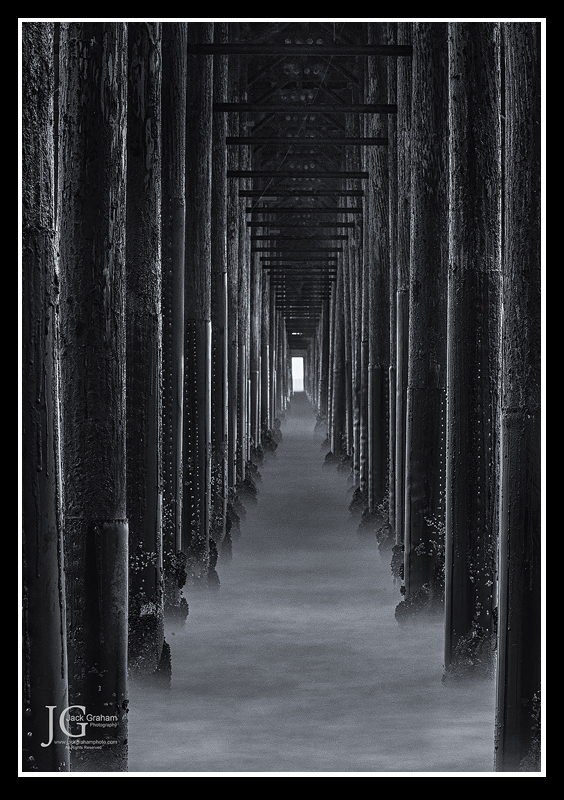
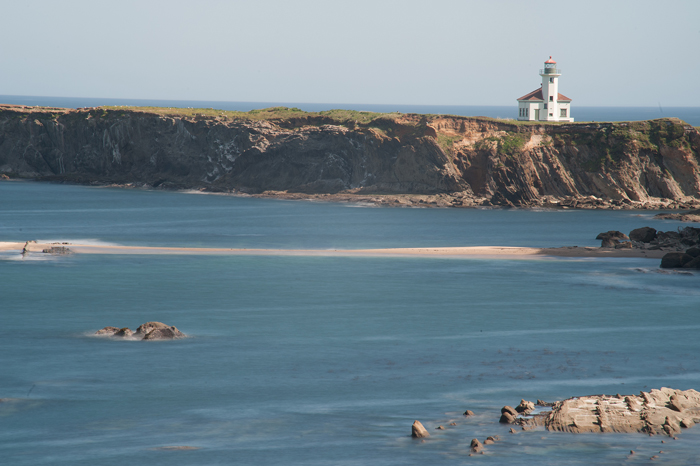
Oceanside Pier, California 86 Second exposure
Again, remember this essay is about long exposures in landscape photography. Techniques for night photography, light painting and other artistic uses of long exposures do require different techniques than that of landscape photography.
Like any other composition, composing your image, choosing your subject matter and assessing the light is mandatory. Essentially, you are making the same image without the long exposure effect, but adding this effect to create the desired result.
Assuming you have chosen a good subject, with good light and one that has some moving water, clouds, other aspects or all of the above, I’ll discuss how I go about making long exposures.
After setting up my tripod and camera I go through all the things I do for normal photography. I then check the light and properly meter the subject without using any filters. Having a filter on before focusing will not allow you to see a thing. It is just too dark due to the denseness of the filters. After this here is my procedure.
1) I compose, determine the aperture I want and focus the image in the proper manner (if you auto focus without the filter switch to manual)
2) I determine the shutter speed based in ISO and Aperture without the filter on.
3) I carefully screw in my filter of choice, either the 10 stop Mor-Slo or the Vari ND.
4) I double-check to make sure the screen that closes over my viewfinder is closed. This insures proper metering and prevents light from entering the camera while the shutter is open. This is very important.
5) I now set my shutter speed to the “bulb” setting allowing my shutter release cable or remote timer to control the shutter speed.
6) I determine how long I need my shutter to be open based on the shutter speed determined without the filter. This math can get quite complicated. I have developed a timetable, based on the math involved. NOTE: If your shutter speed is longer or shorter than desired, you can change the shutter speed simply by increasing or decreasing the ISO. Remember that digital noise increases with higher ISO’s as well as long exposures!
|
Normal Exposure |
ND 3 stops |
ND 6 stops |
ND 10 stops |
|
with no filter |
|||
|
1/500 |
1/60 |
1/8 |
2 |
|
1/250 |
1/30 |
1/4 |
4 |
|
1/125 |
1/15 |
1/2 |
8 |
|
1/60 |
1/8 |
1 |
15 |
|
1/30 |
1/4 |
2 |
30 |
|
1/15 |
1/2 |
4 |
60 (1 minute) |
|
1/8 |
1 |
8 |
120 ( 2 minutes) |
|
1/4 |
2 |
15 |
240 (4minuts) |
|
1/2 |
4 |
30 |
480 (8minutes) |
|
1 |
8 |
60 (1 minute) | 900 (15 minutes) |
|
2 |
15 |
120 ( 2 minutes) | 1800 (30 minutes) |
|
4 |
30 |
240 (4minuts) | 3600(60minutes) |
|
8 |
60 (1 minute) | 480 (8minutes) | 7200( 2 hours) |
|
15 |
90 (1.5 minutes) | 900 (15 minutes) | 14400(4Hours) |
|
30 |
120 ( 2 minutes) | 1800 (30 minutes) | 28000 (8 hours) |
| Exposure time in Seconds | Important: Take 1st reading with NO filter |
7) I set my remote cable release to the desired time based on the shutter speed with no filter attached.
8) Assuming your light conditions didn’t change…..Make the image.
NOTE: THERE IS A GREAT FREE APP that I use on my I phone— its called LONGTIME EXPOSURES. This one is free… there are other that are not. This one works great!
FINAL CONSIDERATIONS:
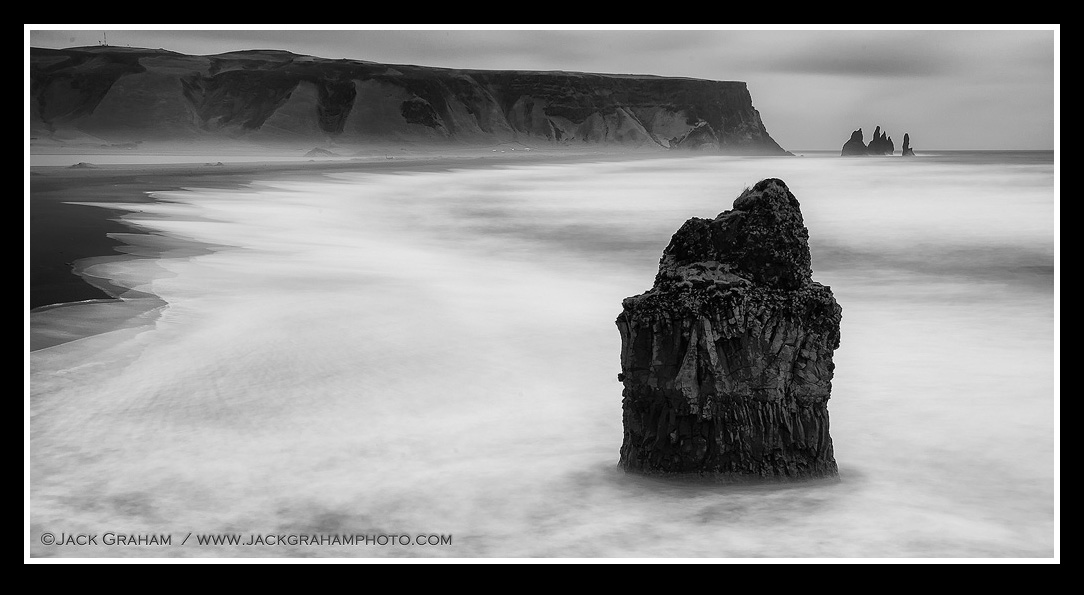
Vik Iceland / 71 Second Exposure
There are a few variables that you need to consider when making long exposures.
1) When making long exposures you’ll need to slow down even more than normal to make sure your settings are correct. Creating a concept for an image when making long exposures is very important. Soon you’ll learn to visualize the final outcome.
2) After you make the image do not use your LCD to evaluate anything other than our histogram.
3) Experiment; change the ISO thus making the shutter longer or shorter. When you get back to your monitor then choose the effect you like.
4) I always recommend shooting RAW files.
ONE LAST THOUGHT
This essay is not an advertisement. It is simply my endorsement. I have experimented with filters from other manufactures. I have found without question the Singh-Ray filters to be of the highest quality without any measurable color shift. Color shift is the biggest problem in filters, especially ND filters. There is no easy cheap way to make a good quality ND. Singh Ray filters are highly recommended.
I recently made two images. One was using the Singh-Ray 10stop Mor-Slo filter, the other with their main competitor in a similar price range. The results speak for themselves. There is absolutely no color shift with the Singh-Ray, but a large one with their competitor. These images were taken about 2-3 minutes apart. Same light, same camera settings 14 sec / F16 -1/3 comp ISO 200Consider this when purchasing filters.
Singh-Ray Mor Slo 10 top filter

The “Competitor”
Singh-Ray Filters
2721 SE Highway 31, Arcadia, FL 34266-7974 USA
For fastest response, telephone Singh-Ray at 800-486-5501 or 863-993-4100
during business hours, 9am to 5pm Eastern US time, Monday-Friday
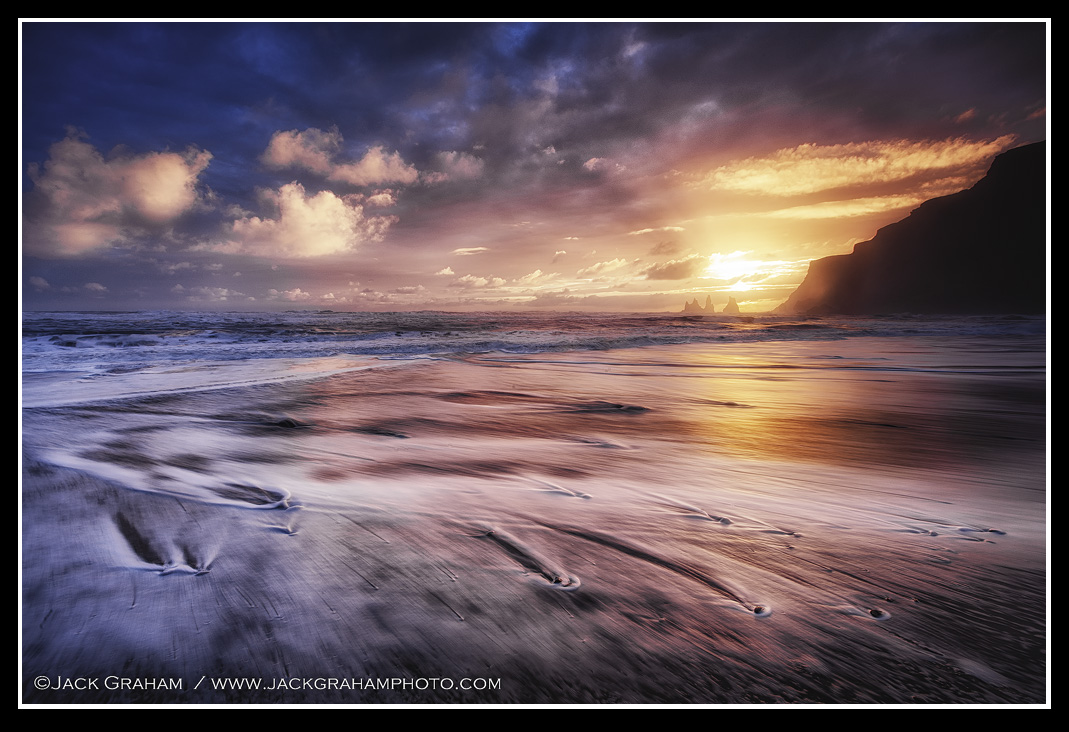
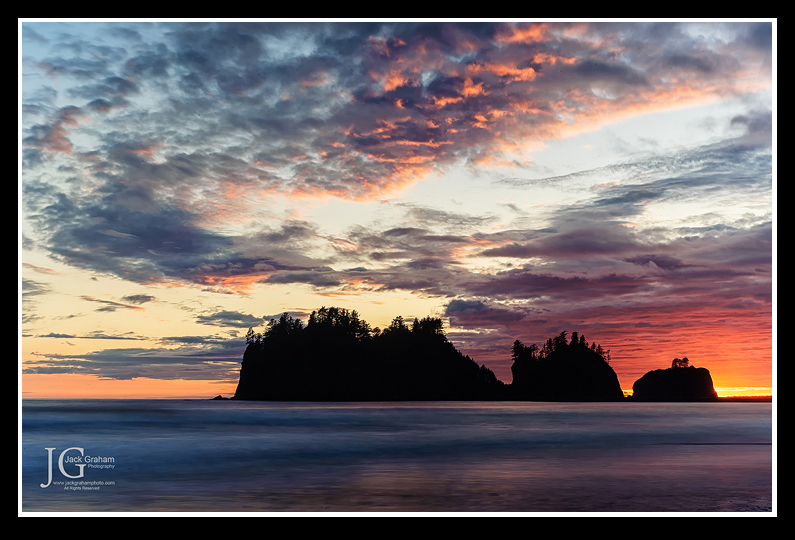
Sunset on the Southern Iceland Coast
JACK GRAHAM PHOTOGRAPHY www.jackgrahamphoto.com
LEARN to SEE LEARN to THINK LEARN to CREATE
______________________________________________________________________
2013 Workshop schedule Workshop Registration Form Workshop Overview
Workshop FAQ’S Workshop Referrals One on One Individual Workshops PODCAST
JACK GRAHAM PHOTOGRAPHY e books –available for purchase and immediate download
ALSO VISIT: www.ultimateiceland.com
SEE SPECIAL LAST MINUTE INFORMATION ON WORKSHOPS BELOW!
IMPORTANT WORKSHOP INFORMATION
ALSO VISIT: www.ultimateiceland.com
Due to a cancellation, I have one opening for my June workshop in the Oregon Coast. You can access information on this workshop HERE
 There are two spots open for the Workshop I conduct for the Pacific Northwest Art School on Whidbey Island, in the Puget Sound neat Seattle in June as well. Information is found HERE. Also there is a spot open for the workshop in the Columbia River Gorge in about 2 weeks. Information found HERE
In addition our July 4-14, 2013 Ultimate Iceland Workshop is almost full. This is a trip of a lifetime for any photographer. Please consider joining us!
ULTIMATE ICELAND “1” July 2013
You can see some images made my last year’s attendees here http://jackgraham.photoshelter.com/gallery/2012-ICELAND-WORKSHOP-ATTENDEE-IMAGES/G0000dpVO0jXHKCI/
 This October, will be my 19th year conducting a workshop in the Eastern Sierra. Again, I’ll be joining forces with my good friend, an amazing photographer and thinker, and co-leader Guy Tal. Please consider joining us. This is a highlight of the year! Details found HERE.
Also in October, I’ll be back in NE Ohio for our bi-annual FALL COLOR & A DAY with the AMISH PHOTOGRAPHY WORKSHOP. (Including a private Amish dinner) with my Amish friends on their farm in Sugarcreek Ohio. I’ll be teaming up with my good friend, world-class photographer and teacher Bill Fortney (www.billfortney.com) for a workshop you will not want to miss!
I’ll be in Utah October 2013 for a late October workshop in the red rock country in and around Zion NP
LIMITED SEATS and filling fast:
DEATH VALLEY NATIONAL PARK/ NOVEMBER 2013 Jack Graham & Bill Fortney. Do NOT miss this one!
ALSO VISIT: www.ultimateiceland.com

ND Timer is a great App for making calculations.
Thanks for sharing your info. I truly appreciate your efforts and
I am waiting for your next post thank you once again.